Showing posts with label fruit. Show all posts

Mar 26, 2014

Flavored Water - or Agua Fresca

I am so excited to share with you my newest thing - naturally flavored water!  It is so delicious and has an added bonus of really making me want to drink water - a must when you are expecting!

About a month ago, I started keeping a jar of water in the refrigerator with one or two lemon slices in it.  That progressed to experimenting with other fruits.  Next, I want to experiment with mixing fruits and herbs.


As I was photographing these flavored water's, Charlie came by and asked me, "Did you know this is how they flavor water in Mexico... it is called agua fresca."  I had no idea, but I was off on a wonderful research trail! 

I learned that in Mexico, fruits, cereals, flowers and seeds are blended with sugar and water to create delicious beverages.  I don't add sugar to my flavored waters, but I am very interested in using flowers, cereals and seeds in addition to fruits to make flavored water.  I will let you know as I experiment further.

Today, I'd like to share some of the fruit ideas that I've recently tried for flavoring water.  But, you don't have to do what I've done!  Honestly, you can combine most fruits and herbs according to your favorite flavors and what you have on hand in your fridge.


Flavored Waters


  1. Tangerine: 3 tangerine slices in 1 pint water
  2. Strawberry: 3 or 4 sliced strawberries in 1 pint water
  3. Lime: 1/2 lime, quartered in 1 pint water
  4. Strawberry Lemonade: 2 lemon slices with 3 strawberries in 1 pint water
  5. Lemon: 4 lemon slices in 1 pint water
The possibilities are endless!  In the future months, I am excited to share new flavors of water that I will experiment with.

How do you make your flavored water? 

Mar 19, 2014

Canned Peaches

Are you tired of seeing my old posts from last fall?  I hope not, because I was really excited when I found this one about how to can peaches. 


I usually buy a "lug" or two of peaches from a local church - it is a good sized box of peaches that weighs about 25 pounds.


Ah, the beautiful peach!  It is best to use slightly under ripe peaches for canning, as overripe peaches have a bigger tendency to float. 


To remove the skins from each peach, I plunge them into a large pot of boiling water for 30 to 60 seconds -


then immediately plunge them into ice cold water.  This stops the cooking process.


Then, the skins should easily slip from each peach.  If they don't, you might have to kind of rub the peach to get the skins off.


Cut the peach in half, and twist to separate the halves.  Remove the pit and discard.  I also like to use a spoon and scrape out some of the fibers and red "stuff" from the center of the peach.


Now, it is time to make your simple syrup.  I make a light syrup, which is simply 2 1/4 cups sugar to 5 1/4 cups water.  Bring to a boil.  While this is happening, you could prep your jars.  I fill up my water canner with clean water, add my canning jars and bring the water to a simmer.   

After simple syrup comes to a boil, add the peeled peaches and simmer them in the simple syrup for about 2 minutes.

Use a slotted spoon to transfer the peaches from the liquid they were simmering in. Fill the jars with the fruit, leaving 3/4-inch head space between the top of the peaches and the rims of the jars. Pack the fruit in quite tightly, as this will help to reduce floating peaches after they are canned.

Ladle the hot simple syrup over the fruit, leaving 1/2-inch head space in each jar. Wipe the rims of the jars with a clean, damp paper or cloth towel, as any food on a jar rim may prevent a good seal. Secure canning lids and rings.


Process in a boiling water bath - 20 minutes for pint jars, 25 minutes for quarts.  Carefully remove your jars and set on a towel to cool.  The next day, check for proper seal and label!

Feb 27, 2014

Candied Kumquat Tart

One of my uncles lives in Alabama, and one of the things he grows are kumquat trees.  He mailed some to my grandma, and she so nicely shared some with me!

This was my first time eating a kumquat.  Since they are such a beautiful fruit, I wanted to make something special with them.  I decided to make a Candied Kumquat Tart.


Mixing up the crust in the food processor (I love using my food processor anytime I need to cut butter (or shortening, ect...) into a flour mixture)...


The dough wrapped and ready to chill. 


The objects of our affection: the kumquats.


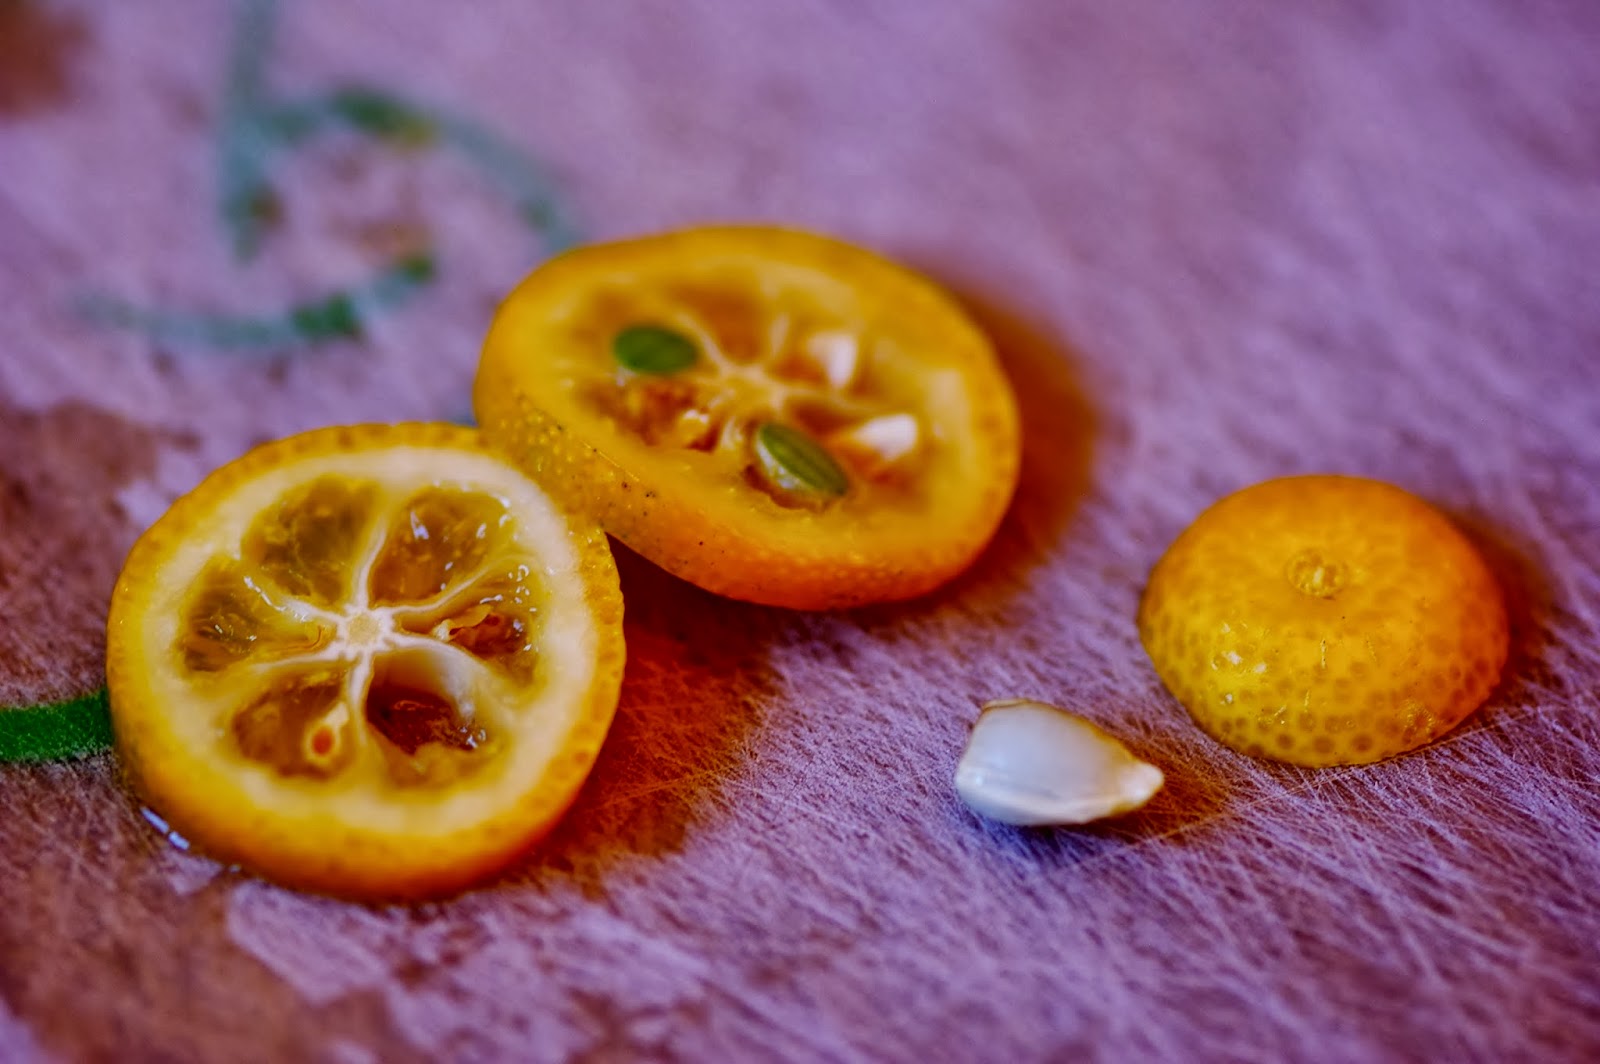
Slicing and removing the seeds.


Sliced kumquats - ready to go!


After I candied the kumquats.  Aren't they beautiful?!


Next, the kumquat cream made and ready to go.


I always strain any custards I make for a perfectly silky smooth texture and this is why: see the bits of fruit and cooked egg?


All the parts ready to go: the crust is baked, the custard done, and the kumquats candied.


The custard in the shell.


The kumquat syrup - I had to try my hand at another "in motion" picture.  I think it turned out better than my last one?


The candied kumquats on the tart:


Candied Kumquat Tart


Crust

  • 1 egg yolk
  • 2 tablespoons very cold water
  • 1 teaspoon vanilla extract
  • 1 1⁄4 cups unbleached flour
  • 1⁄3 cup sugar
  • 1⁄4 teaspoon salt
  • 8 tablespoons cold unsalted butter

For crust: In a small bowl, stir together the egg yolk, water and vanilla; set aside.

To make the dough in the food processor, add flour, sugar and salt to processor bowl.  Cut stick of butter into 1/2 inch-ish slices and place in food processor bowl.  Pulse until butter is incorporated into butter.  Next, while pulsing, pour egg yolk, water and vanilla mixture into flour.  Pulse just until mixture comes together into a ball.

To make the dough by hand, in a large bowl, stir together the flour, sugar and salt. Using a pastry cutter or 2 knives, cut the butter into the flour mixture until the texture resembles coarse cornmeal, with butter pieces no larger than small peas. Add the egg mixture and mix with a fork just until the dough pulls together.

Transfer the dough to a work surface, pat into a ball and flatten into a disk. Use the dough immediately, or wrap in plastic wrap and refrigerate until well chilled, about 30 minutes.

To roll out the dough, on a lightly floured board, flatten the disk with 6 to 8 gentle taps of the rolling pin. Lift the dough and give it a quarter turn. Lightly dust the top of the dough or the rolling pin with flour as needed, then roll out until the dough is about 1/8 inch thick. Use a small, sharp knife to cut out a round or rounds 2 inches greater in diameter than your tart or larger tartlet pans.   Place in tart pan with removable bottom and bake at 350 degrees F. for 15 to 20 minutes.  Makes enough dough for one 9 1/2-inch tart.


Candied Kumquat's
  •  1 cup sugar
  • 1 cup water
  • 4 ounces corn syrup
  • 1 cup sliced kumquats (about 10-12)
Bring water, sugar and corn suryp to a gentle boil.  Add sliced kumquats and gently simmer until kuamquats are translucent, about 20 minutes.  Remove from heat and set aside.


Kumquat Custard Filling:
  • 2 cups milk
  • 1 cup melted vanilla ice cream
  • 1/4 cup cornstarch, heaping
  • 1/8 teaspoon salt
  • 4 egg yolks
  • 7 ounces sweetened condensed milk (1/2 can)
  • 1/2 cup kumquat syrup (from your candied kumquats)
 Add milk, sugar, cornstarch, salt, and egg yolks, (in that order) to blender. Blend 5 seconds and pour into 2-quart glass microwave-safe bowl. Microwave 6 minutes on HIGH, whisking until smooth after 3 minutes, then every minute thereafter.  Add butter and vanilla and whisk until smooth.


To Put It All Together:

In cooled tart shell, pour and smooth out kumquat custard filling.  Arrange candied sliced kumquats on top of the custard in a pretty design.  Chill overnight or at least for several hours.  


  • In a non reactive saucepan bring to a boil the sugar, water and glucose.
  • Slice the kumquats crosswise in 2 mm thick slices.
  • Add the sliced kumquats to the boiling syrup and turn to simmer.
  • Simmer on low for approximately 30 minutes or until tender.
  • Allow to cool and store in a refrigerato
  • - See more at: http://www.chefeddy.com/2012/01/candied-kumquats/#sthash.Aj5bEGe1.dpuf


  • In a non reactive saucepan bring to a boil the sugar, water and glucose.
  • Slice the kumquats crosswise in 2 mm thick slices.
  • Add the sliced kumquats to the boiling syrup and turn to simmer.
  • Simmer on low for approximately 30 minutes or until tender.
  • Allow to cool and store in a refrigerator.
  • - See more at: http://www.chefeddy.com/2012/01/candied-kumquats/#sthash.Aj5bEGe1.dp


  • In a non reactive saucepan bring to a boil the sugar, water and glucose.
  • Slice the kumquats crosswise in 2 mm thick slices.
  • Add the sliced kumquats to the boiling syrup and turn to simmer.
  • Simmer on low for approximately 30 minutes or until tender.
  • Allow to cool and store in a refrigerato
  • - See more at: http://www.chefeddy.com/2012/01/candied-kumquats/#sthash.Aj5bEGe1.dpuf

    Feb 26, 2014

    Banana Cake with Cream Cheese Frosting

    Have you ever had those bananas that sit patiently on your counter, just waiting to be eaten?  As the days go by, they get more and more ripe.  When the point comes that they are just a wee bit too ripe to eat, don't throw them out!  Make this banana cake instead.

    It is moist, flavorful and is covered in an absolutely delicious cream cheese frosting. It has the addition of some apple butter, which healthfully moistens the cake as well as giving it some extra flavor. 

    Note: if you don't want your cake to be this thick, you could spread the batter into a 10 x 15 cookie sheet, too.  But you might want to double the frosting!


    Banana Cake with Cream Cheese Frosting

     Cake
    • 2 cups all-purpose flour
    • 1 teaspoon baking soda
    • ½ teaspoon salt
    • 1⅓ cups granulated sugar
    • 1/3 cup vegetable oil
    • 2 eggs
    • 3 ripe bananas, mashed
    • 2 teaspoons vanilla extract
    • 1/2 cup buttermilk
    • 1/4 cup sour cream
    • 2 tablespoons apple butter 

    Frosting 
    • 8 ounces cream cheese, at room temperature
    • ½ cup unsalted butter, at room temperature
    • Pinch salt
    • 4 cups powdered sugar
    • 1½ teaspoons vanilla extract

    To make the cake, preheat oven to 375 degrees F. Lightly grease a 9x13-inch baking pan; set aside.  In a medium bowl, whisk together the flour, baking soda and salt; set aside.  Using an electric mixer, beat the sugar and oil together on medium speed until completely combined. Add both eggs and beat to combine, then add the mashed bananas, apple butter and vanilla extract and beat until combined. Reduce the speed to low and add the flour mixture in three additions, alternating with the buttermilk, mixing until combined.  Pour into the prepared pan.

    Bake for 30 to 35 minutes, or until the top is golden brown and a thin knife inserted into the center comes out clean. Set on a wire rack to cool completely.

    To make the frosting, with an electric mixer, cream together the cream cheese, butter and salt on medium speed.  Reduce the speed to medium-low and gradually add the powdered sugar until it has all been combined.  Add the vanilla extract, increase the speed to medium-high and beat until light and fluffy.

    Spread the frosting over the cooled cake, cut into squares and serve.

    Feb 24, 2014

    Lemon Bars

    Do you ever just want something really lemony, tangy and yet a little bit sweet?  Sometimes we do.  Plus, Charlie loves lemon desserts.  When we are in the mood, I pull out this lemon bar recipe and get baking.  I love these lemon bars because:

    a) the crust has the perfect amount of crispness and sweetness
    b) the lemon layer is full of tang and the dusting of powdered sugar sets it off beautifully
    3) aren't they elegant looking?


    Lemon Bars


    Crust
    • 1 3/4 cup flour
    • 2/3 cup powdered sugar
    • 1/4 cup cornstarch
    • 1/4 teaspoon salt
    • 1 cup unsalted butter, room temp

    Lemon Filling

    • 4 eggs
    • 1 1/3 cup sugar
    • 3 tablespoons flour
    • 2 teaspoons finely grated lemon zest (about two large lemons worth)
    • 2/3 cup fresh lemon juice, strained
    • 1/3 cup whole milk
    • 1/8 teaspoon salt
    • extra powdered sugar


    Preheat oven to 350 degrees F.  Adjust oven rack to middle position.  Lightly butter a 13- x 9-inch baking dish and line with wax or parchment paper allowing edges to come over the sides.  Pulse flour, powdered sugar, cornstarch, and salt in food processor.  Add butter and blend, 8 to 10 seconds, and then pulse until mixture resembles coarse meal.  Sprinkle mixture into prepared baking pan and press firmly into an even layer with slightly raised sides to hold in the filling.  Refrigerate for about 30 minutes and then bake until golden brown, about 20 to 30 minutes; remove from oven, place on a wire rack and let cool slightly. After crust is finished baking, reduce oven temperature to 325 degrees.

    While crust is baking, make the lemon filling:  In a medium bowl, whisk eggs, sugar, and flour; stir in lemon zest, lemon juice, milk, and salt to blend well.  Pour mixture onto the pan on top of the warm crust.  Bake for 20 minutes at 325 degrees F, or until the filling feels firm when touched lightly. Remove from oven and transfer the pan to a wire rack and cool for 30 minutes. After cooling, grasp the parchment paper and carefully lift the bars onto a cutting board. Cut into serving size squares or bars, wiping your knife clean between cuts if necessary.  Sieve powdered sugar over bars and serve.

    Jan 29, 2014

    Cherry Snowflake Pie

    Did you ever have that Raspberry Snowflake Pie way back when?  It used to be one of our Thanksgiving traditions, but we eventually decided several things:

    a) The pie was much too sweet.
    b) The pie didn't hold any shape.
    c) The raspberry seeds got stuck in our teeth.

    This last Thanksgiving, I had a hankering for the pie again, however, I wanted to make a few changes - hopefully for the better.  I decided to:

    a) Cut out a bunch of sweetness.
    b) Add unflavored gelatin to the cream cheese layer to help it hold its shape.
    c) Change the pie filling to cherry to eliminate the "seedy" problem. 

    All in all, these changes had a great effect on the pie and my family gave it excellent marks.  This pie will definitely be going back on our traditional Thanksgiving menu!

    As a side note, I also thought that this pie would make a lovely wintry Valentines Day special dessert for that special someone in your life!  You could even get really creative and cut the round "snowflake" into a heart shape.  Then, you could lay out the cherries in a matching heart shape on the top of the pie.  Please send me some pictures if you try this, I would love to see them!


    P.S. As you can tell from the pictures, I forgot to dust the top of the snowflake with powdered sugar.  Next time!

    P.S.S. You can also probably tell from the pictures that the left side of the snowflake broke.  Make sure to handle with care, the snowflake is very delicate! 


    Cherry Snowflake Pie

    • 1 15 oz Refrigerated Pie Crust (or a bottom and top homemade crust)
    • 1 21 oz can cherry fruit pie filling
    • 1 8 oz package cream cheese, softened
    • 1/2 package unflavored gelatin
    • 1/4 cup water
    • 1/2 of a 14 oz can sweetened condensed milk (7-ish ounces)
    • 1/4 cup lemon juice
    • 1/2 teaspoon almond extract
    • 1/2 to 1 teaspoon powdered sugar

    Heat oven to 450 degrees F.  Prepare one pie crust as directed on package using 9 inch pie pan. Bake for 9 to 11 minutes. Cool.  Next, to make snowflake crust, unfold remaining crust onto ungreased cookie sheet; press out fold lines.  Cut crust into 7 1/2 inch diameter round; discard scraps.  Refold round into fourths on cookie sheet. With knife, cut designs from folded and curved edges; discard scraps.  I tried to be as creative as I could by using a knife to cut designs and also a large cake tip to cut small circles.  Unfold your snowflake.  Bake on the cookie sheet for 6 to 8 minutes or until crisp.  Cool completely.

    Now to fill the pie.  Add the unflavored gelatin to the water and let sit for 5 to 10 minutes.  Reserve about a 1/2 cup of the cherry pie filling; spoon remaining filling into baked, cooled shell.  In large bowl, beat cream cheese until light and fluffy.  Add softened unflavored gelatin and beat well.  Add sweetened condensed milk; mix well.  Add lemon juice and almond extract; mix well again.  It doesn't hurt this filling to get extra air into it.  Spoon cream cheese filling over cherry pie filling in crust.  Refrigerate at least one hour.

    To decorate the top, spoon reserved cherry pie filling around edge of pie.  I thought it looked nice to arrange the cherries fairly evenly around the edge.  Place snowflake crust over top, balancing on the cherries.  Refrigerate the pie for several hours.  Sprinkle the pie with powdered sugar just before serving.

    Jan 11, 2014

    Indian Trail Cranberry Sauce - and A Cranberry Jello

    Did you ever buy that handy little tub of cranberry orange sauce, found in the freezer aisle?  It was called Indian Trail Cranberry Orange Sauce.  Unfortunately, I haven't been able to find it for a while.  What to do?  This last Thanksgiving, I decided to try to make my own.  Well, it can't be that hard, I reasoned.  To my surprise and delight, it was super easy and tasted the same (or better).

    For those that don't know, this is what it looked like:


    I started with five or six of those little clementine oranges, washed and cut them in pieces, and pulsed them in a food processor until roughly chopped.  Note: you can use one or two regular oranges, but I found I liked the taste of these clementines better.    


    Add one bag of fresh cranberries to the food processor - just plunk them right down on top of the oranges.


    Add 1/2 to 1 cup of sugar - depending on your taste buds and how sweet your darling clementines are.


    Pulse until of a relish-y consistency.


    Pour the mixture into a sieve and let it drain for a while. 


    I then used the relish to make this Cranberry Jello Salad, fixed up from a recipe I saved years ago from the back of the Indian Trail Cranberry Sauce box.

    This salad looked so pretty on the Thanksgiving table, but you could make it at any time! 


    Cranberry Orange Sauce


    5 or 6 clementine oranges (or you could use 1 or 2 regular oranges)
    1 whole bag fresh cranberries (frozen cranberries are fine too)
    1/2 to 1 cup sugar

    Wash the clementines or oranges.  Cut into chunks, removing seeds and pith as necessary.  Place in food processor and chop roughly.  Add the cranberries and sugar.  Pulse until chopped.  Let the mixture drain for a while to removed some of the excess liquid (Note: I saved this liquid and it made a great drink with 7-Up and ice, or you could add something stronger if you wish...).  Refrigerate or freeze cranberry orange sauce until ready to use. 

    Cranberry Orange Jello Mold


    2 packages (3 ounces each) cherry gelatin
    2 1/2 cups boiling water
    1 cup crushed pineapple (with juice)
    1 package (10 ounces) Indian Trail Cranberry Orange Sauce
    8 ounces Cool Whip

    Dissolve gelatin in boiling water. Stir into it Indian Trail Cranberry Orange Sauce and crushed pineapple. Pour into mold, so it is about an inch thick.  Refrigerate until firm enough to add next layer, about 1/2 hour.  Meanwhile, remove about half of the remaining cranberry/orange/jello mixture.  Gently fold in the thawed Cool Whip.  Gently smooth the Cool Whip mixture into the mold, and again, refrigerate for about another half an hour.  At this time, top off the mold with the remaining jello mixture (or whatever you can fit into your mold, I had a little bit extra).  Refrigerate until time to remove from mold (at least 6 - 8 hours) and serve.