Oct 26, 2013

Peanut Butter Molasses Sandwich

For lunch today, I was really in the mood for molasses.  Strange?  I thought so too.  So I ended up creating this sandwich: slightly toasted bread, a layer of crunchy peanut butter, a 1/4 slice of bacon, and about a tablespoon of molasses drizzled over the whole thing.  The molasses was so sweet and the bacon and peanut butter just a little bit salty, with a satisfying crunch from the crunchy peanut butter.  It was so delicious - and easy to make!

Do you like to eat molasses? 


Oct 25, 2013

Earthquake Cake

Have you ever eaten an Earthquake Cake?  The first one I had was at a church potluck when I was a teenager.  As soon as I tried it, I knew I had to have the recipe!  Thankfully the other lady was willing to share! 

Earthquake Cake is not pretty.  It is lumpy, bumpy and has caverns and crevasses.  But it is also chocolately, nutty, coconut-ty chewy, nutty and a little bit creamy. 


The recipe starts out with layers of coconut and pecans in the bottom of a 9x13 pan. 


Then, chocolate cake batter.


The cake batter is sprinkled with blobs of a cream cheese mixture, marshmallows, toffee bits and chocolate chips.   


Then it is baked, and the crevasses are formed.


Leaving you with ooey-gooey-chocolatey-goodness.


Earthquake Cake

  • 1 cup chopped pecans, toasted
  • 1-2 cups sweetened flaked coconut, toasted
  • 1 box chocolate cake mix
  • eggs, oil and water for cake mix
  • 1/2 cup butter, melted and bubbly
  • 1 8-ounce package cream cheese, softened
  • 3 cups powdered sugar
  • 1 small package cheesecake instant pudding
  • 1 cup mini marshmallows
Grease 9x13 pan.  Sprinkle pecans and coconut over bottom of pan.  Prepare cake batter per box instructions and spread over nuts and coconut.  Mix melted butter and cream cheese with electric mixer until smooth.  Add powdered sugar and pudding mix and beat on low until smooth and creamy.  Dollop heaping tablespoons of cream cheese mixture over chocolate cake batter.  Bake for 40 to 45 minutes or until cake is set (cream cheese spots will be soft and gooey).  Let cool and enjoy!

Oct 24, 2013

Fresh Peach Pie

I bought one "lug" of peaches this year, and one of the things I decided to do with them was to make a fresh peach pie.  I love fresh peach pie because, well, the peaches are so fresh! 


We start with a pre-baked pie crust. 


Of course, the star ingredient: fresh, juicy, perfectly ripened peaches.


Next we make a glaze.


And peel and slice the peaches.  Since the glaze has lemon juice in it, you don't have to worry about treating the peaches.  If you'd like, though, you could certainly hit them with some fruit fresh or some other agent to prevent darkening!


Next, gently fold the sliced peaches into the glaze mixture.


And gently pour the peach mixture into the pie shell.  Refrigerate for about four hours before serving.  Note: I let this sit overnight in the fridge and that was a bad idea - the peaches turned a little dark and the glaze "broke" a little - I would definitely recommend eating this the same day you make it! 


Fresh Peach Pie


  • 1 cup sugar
  • 1/2 cup water
  • 1/3cup corn starch (heaping)
  • 1/4 cup fresh squeezed lemon juice
  • pinch salt
  • yellow food coloring, optional
  • 1/4 cup butter
  • 5 or 6 peaches, peeled and sliced
  • 1 precooked 9 inch pie shell
  • whipped cream if desired
Combine sugar, water, cornstarch, food coloring, lemon juice and salt in a medium saucepan.  Whisk until combined.  Stirring constantly, cook over medium heat until thick (and hard to stir.)  Remove from heat and add butter, stir until melted and combined.  Add peaches and gently fold to coat.  Pour into precooked pie shell.   Refrigerate for about four hours to set.  It is best to eat this pie as soon as possible after the four hours.  Top with whipped cream if desired and serve.

Oct 23, 2013

Canned Corn

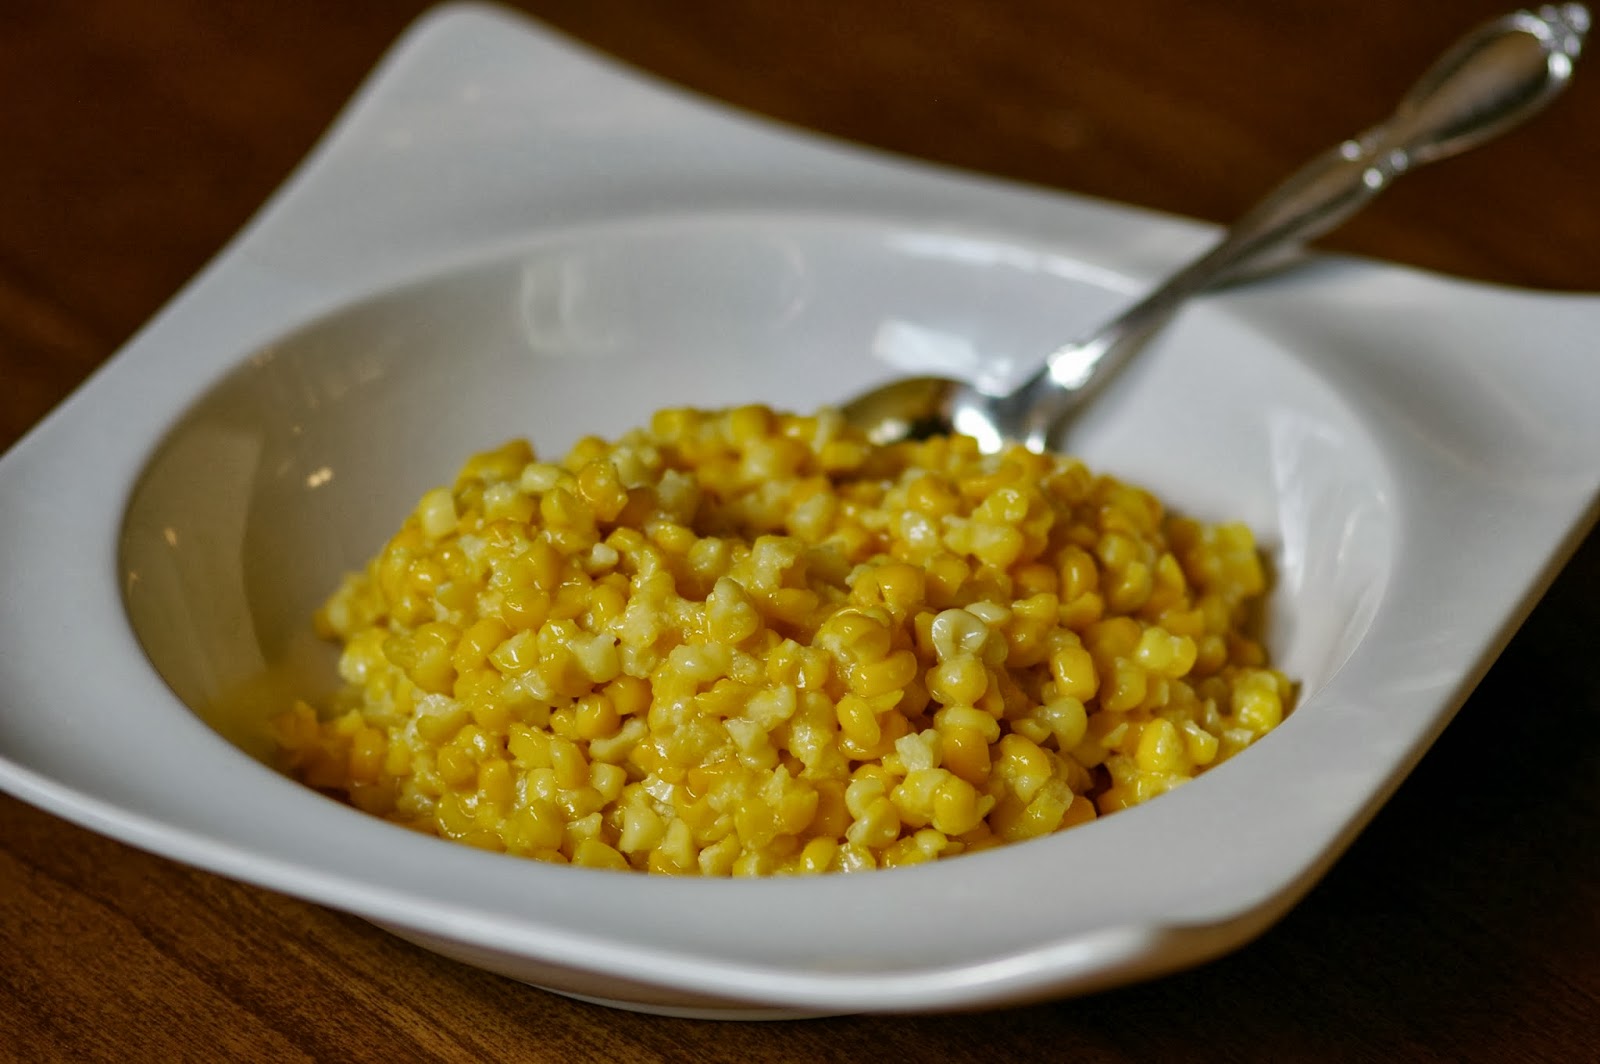
Part Three of the Corn Saga: Canned Corn.  Charlie and I prefer canned corn over frozen corn, so, I decided to can the rest of the corn from Grandma and Grandpa.


Start with a bunch of fresh-as-possible corn-on-the-cob.


Shuck the corn.  Remove husks and silks from corn cobs.  Try to get as many of the silks off of the corn as possible.  For cutting the cobs, if it helps, you can leave the bottom of the stalk attached so you have something to hold onto when cutting the kernels off.  I tend to cut off half a cob at a time, then flip it over and hold onto the other end while cutting off the remaining kernels.


Since we are canning whole kernel corn, all we have to do is to cut the kernels off the cob.  Cut corn from cob, making sure to not scrape the cob.  Transfer rinsed corn to a large bowl.


As I said before, this large bowl holds 42 cups of corn!


COMMERCIAL CANNING BREAK: This would be a good time to:
1) add water to your pressure canner, add a 1/4-ish cup of vinegar (I like to do this to keep the water clean and helps keep the inside of the canner clean) and start the heat on the canner. 
2) put a pot of water on to boil. This will be the water you pour over the corn after it’s in the jar.
3) Put your lids and rings into a small saucepan of water on low heat. These don’t need to boil, but they must get warm so the rubber softens.
COMMERCIAL CANNING BREAK OVER.


Ok, back to the corn!  Using canning funnel, spoon the corn into hot, sterilized jars - the jars have either been warming in a 170 degrees F oven or have just went through a wash cycle and are drying in the dishwasher or are simmering in the boiling water canner.  Following the raw pack method in the Ball Canning Book, I simply ladle the corn into the jars (I use pint jars, but feel free to use quarts).  Don’t pack the corn in the jar, just loosely fill up to the bottom of the neck of the jar.


Add 1/2 salt to each pint and 1 teaspoon salt to each quart.


Pour boiling water over corn, and use spatula or tool to make sure all the air bubbles are removed from each jar.  Leave an inch of headspace.  Wipe around the tops of all the jars with a clean towel, and add the lids and rings.  Transfer all the jars to the canner that has been heating up on the stove.


Since all pressure canners are different, make sure to read your manufacturers directions for your exact canner.  For my canner, I place the lid on the canner, and make sure to lock it in place.  Let the canner continue heating.  You will hear a lot of boiling going inside the canner, but that is just the sounds of the pressure building and is normal.  Don’t start counting your “processing” time until the pressure is at 10 lbs.  Once the 10 minutes is up, I turn the heat off and let the canner sit. You have to let the pressure inside the canner release which, for my canner, can take 30 minutes to an hour.  On my canner, the pressure gauge will slowly drop back down to zero.  At this time the lid can be removed - be very careful - there will be hot steam coming out of the canner!


Remove the jars from the canner and set them on a towel on the counter top with space in between them. Allow them to cool completely – they are very hot when they come out of the canner.


As the jars cool, you’ll hear lovely popping sound that says the jar has sealed. What happens if I am not around to hear the pop?  The lids have a slight circle indention (made that way) so you can visually see if the jar sealed.  If after cooling you are able to push the middle of lid up and down the jar has not sealed and should be used very soon.

Enjoy your canned corn this winter!


Oct 22, 2013

Fermented Dill Pickles

For years, I have been on the quest to make the perfect crispy, fermented dill pickle.  I've made bunches of batches, and they have ranged from salty enough to melt the ice from the sidewalks, to vinegary enough to wash the windows.  And pretty much all the time, they have been a soggy, limp, nasty consistency. 

But this is a new year!  With new research and new ideas!  So without further ado, I will share the (hopefully) Improved 2013 Fermented Dill Pickles recipe. 


First important ingredient: fresh cucumbers.  It is important to get fresh-picked-today small pickling cucumbers (not the slicing variety) because if you start out with soft cucumbers, the softness will only get worse with the pickling.


Next important step: take a tiny slice off the end that had the blossom.  Since it was sometimes hard to figure out which end to cut, I decided to slice off both ends.  This also created a more uniform look.


But why cut off the ends one at a time?  Let's do a bunch at once.  


Next, the fresh ingredients.  The first one of note is the fresh grape leaves.  This is a new technique for me this year, one I am trying based on my research.  I found out that adding fresh grape leaves to a crock of fermenting cucumbers adds tannin, which helps keep the pickles more crisp.  And also, I added fresh dill and (not pictured) garlic and onions. 


Next: the crock.  The crock needs to be cleaned, and totally free of contaminates and any fats or oils which can make for soft pickles.  Before filling, I wash my crock thoroughly, then run boiling water down the sides.  Then you can start filling by adding the fresh grape leaves, garlic, onions, and spices.


And ..... here they are!  Fermented dill pickles, packed into jars.  I let the crock sit for about a month, and the pickles ended up a little soft - but the flavor was good!  So I would recommend letting these sit for one to two weeks, then put them in jars and refrigerate them.


Fermented Dill Pickles


Brine
  • 1 gallon water
  • 1 cup kosher salt
  • 2 cups cider vinegar
  • 1 cup white vinegar
  • 1 tsp alum
In Crock:

  • 1 cup pickling spice
  • 4 fresh grape leaves
  • 1 bulb garlic, peeled
  • 2 onions, sliced
  • 2 or 3 dill weed heads
  • 1 garlic scape
  • 5-6 pounds baby cucumbers, scrubbed and blossom end trimmed

Lay "in crock" items in the bottom of your cleaned crock, and place the cucumbers on top.  In another large bowl, mix together brine ingredients and stir until the salt is dissolved.  Pour over cucumbers.

Let sit for one to two weeks, then pack into jars and refrigerate. 

Oct 21, 2013

Crispy Chocolate Toffee Cookies

Lately, my goal has been to eat things out of the pantry, rather than buying new groceries.  I know it sounds obvious, but for some reason it has been a hard lesson for me to learn... The reason I am enjoying it is that it helps me be creative in thinking of good ways to use things up.

The other day, I wanted to make some cookies.  I went to the pantry and pulled some items out, and decided to throw them together to make an experimental batch of cookies.  When it was all said and done, they actually turned out pretty tasty - chocolatey, nutty with just the right amount of crispness.  


Crispy Chocolate Toffee Cookies


  • 2 sticks butter, softened
  • 2 tablespoons cashew butter
  • 1 cup raw turbinado cane sugar
  • 1/2 cup white sugar
  • 2 eggs
  • 1 tsp vanilla
  • 1 pkg cook and serve vanilla pudding
  • 2 1/4 cups all purpose flour
  • 1 teaspoon baking soda
  • 1 teaspoon salt
  • 2 cups chocolate chips
  • 1/2 cup toffee bits
  • 1 cup chopped pecans, toasted

Preheat oven to 375 degrees F.  Combine flour, baking soda and salt in small bowl.  Beat butter, granulated sugar, brown sugar, pudding mix and vanilla extract in large mixer bowl until creamy.  Add eggs, one at a time, beating well after each addition.  Gradually beat in flour mixture. Stir in chocolate chips, toffee bits and walnuts.  Drop by rounded tablespoon onto ungreased baking sheets. Bake for 9 to 11 minutes or until golden brown. Cool on baking sheets for 1 minute; remove to wire racks to cool completely.

Makes about 5 dozen cookies.

Oct 20, 2013

Apple Butter

When I was 9 years old, my grandparents bought me the American Girl Doll, Felicity.  I was fascinated with reading Felicity's books and learning about the history of colonial Williamsburg.  I had so much fun playing with the doll and her wonderful accessories.  A few years later, I received Felicity's sixth book, Changes For Felicity.  The book starts out with Felicity picking apples to make into apple butter.  As I went back in time with her, I helped her stir the apple butter over the fire.  That was when I decided I wanted to try making my own apple butter!  I found a recipe in an old church cookbook, and tweaked it around until I came up with this recipe.

My dad and brothers are particularly fond if this apple butter, and I try to make a bunch every year to keep them in good supply.  Even though the process is a little time consuming, the results are well worth the effort.      


Start out with about 25 apples.  As an experiment, this year I also threw in about a cup of crab apples.


Quarter the apples - no need to peel or core.  I also think that keeping the peels on while cooking adds a few extra nutrients to the finished apple butter.


Here you can see the crabapples mixed in with the others - I didn't quarter the crabapples.


Place apples in a large heavy-bottomed pot and add 3 cups of apple cider.  I like to use apple cider rather than water as it gives the apple butter more flavor.


Cook down the apples until the whole mixture is soft (not pictured) (because I forgot to take a picture of this part).  Remove from heat and let the mixture cool slightly. 

Then, place a sieve over a bowl and press the cooked apple mixture through the sieve.  Discard the skins and core pieces. You could also use a food mill, but I have found that this sieve/glass technique gives me a much better consistency. 


Place the apple mixture in clean pot.  Add sugar and spices.


Let cook for about 3 hours, or until darkened and thick.  Pack into hot sterilized jars and boiling water bath for 10 minutes. 


Apple butter is delicious on toast, sandwiches, scones, oatmeal, waffles, pancakes, french toast or just out of the jar!


Terra's Old Fashioned Apple Butter


  • 20 medium apples
  • 3 cups apple cider
  • 2 1/2 teaspoons cinnamon
  • 1 1/2 teaspoons ginger
  • 1 heaping teaspoon cloves
  • 5 to 5 1/2 cups sugar
  • 1/4 teaspoon salt
  • 1 teaspoon vanilla
Cut apples into 4ths.  Put into heavy kettle.  Add cider and cover.  Cook over low heat until very tender, stirring often (will scorch easily!).  Cool slightly, then rub through a sieve or use a food mill to remove apple skins and seeds.  Measure out pressed apples, which should be about 11 cups of pulp.  Put into clean heavy kettle.  Add sugar; you want about half as much sugar as pulp.  Stir in spices.  Simmer over low heat until dark and thick, for two or three hours.  Stir frequently, as this scorches easily.  A nonstick pot or pan works well for this procedure.

Remove from heat and pour into hot sterilized jars, leaving 1/4 inch headroom.  Tighten lids, process in boiling water bath for 10 minutes.  The apple butter will thicken as it stands.

Oct 19, 2013

New and Improved Chicken Cabbage Salad

I think that most everyone has had that old stand-by chicken cabbage salad with the ramen noodles broken up in it.  I know I have eaten it a lot over the years, and I really like it.  The other day I was in the mood for it again, but decided to try to take the salad to the next level. 

Using red cabbage immediately gave the salad a face-life.


Adding more vegetables and a fixed-up dressing complete this tasty recipe.


Chicken Cabbage Salad

  • 1 medium head red cabbage, fairly finely chopped
  • 2 pounds cooked chicken, chunked (more or less optional)
  • 4 green onions, sliced
  • 2 stalks celery, thinly sliced 
  • 1 red pepper, chopped
  • 1 cup sugar snap peas, chopped
  • 2 tablespoons sesame seeds, toasted
  • 1/3 cup finely sliced almonds, toasted
  • 1 package chicken flavored ramen noodles
Dressing
  • 1/3 cup oil
  • 1/4 cup white vinegar
  • 1/4 cup seasoned rice vinegar
  • 1 seasoning packet from the ramen noodle package
  • 2 tablespoons sugar or honey
  • dash soy sauce
  • dash sweet chili sauce
  • dash sesame oil
Mix cabbage, chicken, green onions, celery, red pepper and peas together.   Mix all dressing ingredients together and stir thoroughly.  Stir dressing into vegetable/chicken mixture.  Let sit in refrigerator for at least an hour.  Before serving, stir sesame seeds, almonds and crumbled ramen noodles into salad.  Otherwise, what I like to do is to serve the "crunchies" in a separate bowl.  This way, everyone can top their own, and if you have leftovers, the noodles, ect... aren't soggy the next day!


What do you think?  Do you prefer the old, or would you be interested in trying my new chicken cabbage salad?

Oct 9, 2013

Homemade Mustard

When I made Alton Brown's homemade pretzels for the first time several years ago, I also tried making his homemade mustard.  Since then, I've decided that making my own mustard is so tasty, easy and cheap that I started keeping it around all the time.  It begins as a zippy spread that lasts in the refrigerator for about a month, and mellows nicely over that period of time. 


To start, I place some brown sugar and spices in a bowl. 


And collect the wet ingredients in a measuring cup.


Then, stir the wet and dry ingredients together and microwave for one minute.


And use the stick blender to mix for one minute.  Then, the mixture is left to cool down without a lid.  This helps to thicken the mustard. 


As you can see, the mustard thickens as it cools.


Then, I use a funnel to put the mustard into a handy squeeze bottle.  It will keep in the refrigerator for about a month.  We use it on sandwiches, hamburgers, pretzels, and in any recipe where mustard or Dijon mustard is called for.   


Homemade Mustard 


  • 1/4 cup dry mustard powder
  • 2 teaspoons light brown sugar
  • 1 teaspoon kosher salt
  • 1/2 teaspoon turmeric
  • 1/4 teaspoon paprika
  • 1/2 teaspoon garlic powder
  • 1/2 cup sweet pickle juice
  • 1/4 cup white wine
  • 1/2 cup cider vinegar
  • 1/4 cup whole yellow mustard seed  

In a small, microwave-proof bowl whisk together the dry mustard, brown sugar, salt, turmeric, paprika and garlic powder.  In a separate container (a liquid measuring cup works great), combine the pickle juice, white wine and cider vinegar and have standing by.

Place the mustard seed into a spice grinder and grind for a minimum of one minute, stopping to pulse occasionally.  Once ground, immediately add the mustard to the bowl with the dry ingredients and add the liquid mixture.  Whisk to combine.  Place the bowl into the microwave and heat on high for one minute. Remove from the microwave and puree with a stick blender for one minute.  Allow to cool uncovered on counter. Once cool, cover and store in the refrigerator for up to one month.  I like to place the mustard in a handy squeeze bottle for ease of later serving.  

Oct 8, 2013

Old Fashioned Special Freezer Corn

Part Two of the Corn Saga: Old Fashioned Special Freezer Corn.  Before we get started, I just wanted to offer a preliminary warning: this recipe is very very naughty and also very very delicious.  It is so good that I think it could almost count as dessert.  I got this recipe from a fellow nurse I work with, who used to make it for her kids. 


We start with a bunch of corn cut from the cob. 


Then, mix it with cream, butter, sugar and salt (all the best things, right?  Oh my gosh this is so naughty!).


Then, that mixture is baked until all the liquid is absorbed.  Pack into freezer bags - or, dish some up for a little treat after all of that hard work.   


Old Fashioned Special Freezer Corn 

  • 3 dozen ears of corn
  • 1 pound butter
  • 1 or 2 pints heavy whipping cream
  • 1/2 cup sugar
  • 2 tablespoons canning salt
Remove husks and silks from corn cobs.  Remove corn from cob of corn - there should be about 20 cups of corn.  Place corn in large roaster pan.  Add butter, cream, sugar and salt.  Bake in a 350 degree F. oven for about one hour, or until all the liquid is absorbed.  Remove from oven and cool.  Put in freezer bags and freeze. 

Note: this recipe can easily be halved or quartered.

Oct 6, 2013

Corn Relish

My grandparents on my dad's side have always had a large garden - since they were dairy farmers and lived on a farm, this made sense.  But now, even though they are into their eighties, their vegetable garden is still much larger than mine. 

Grandma called me up the other day and said they had "some extra corn" (this is my dining room table heaped with fresh corn on the cob from them). Thank you Gramma and Granpa!


They sure had a lot extra!  But I was very excited to put it to good use. 


We set up a corn-cob-slicing station on an outside table, as it makes such a mess!


This big red bowl holds 42 (!) cups.  That is a lot of corn!  And still more to slice off the cob!


I decided to make three things with the corn: regular canned corn, special freezer corn, and corn relish.  Today we are going to make corn relish - but I will be posting the other recipes soon!

To start the corn relish, I needed some peppers.  I picked a pail full of miscellaneous hot and sweet peppers from the garden.  


Then minced the peppers in the food processor and added them to the corn, along with some spices.


I cooked the mixture for a bit, then canned it in a boiling water bath for 15 minutes.


Tangy + sweet = delicious.  Corn relish works in place of salsa with chips, or as a condiment on tacos or enchiladas or something, or as a topping for grilled meats, ect...

Or you can just eat it by the spoonful.  


Corn Relish 


  • 2 quarts cut corn (about 18 ears) 
  • 2 cups finely chopped onion 
  • 1 cup chopped sweet green peppers 
  • 1 cup chopped sweet red peppers 
  • 1/4 to 1/2 cup chopped hot peppers (I used Hungarian hot peppers)
  • 1 to 2 cups sugar 
  • 2 to 4 cloves garlic, minced 
  • 2 tablespoons dry mustard 
  • 1 tablespoon celery seed 
  • 1 tablespoon mustard seed 
  • 1 tablespoon salt 
  • 1 tablespoon turmeric 
  • 1 quart vinegar


 Remove husks and silks from corn; cut corn from cobs (do not scrape cobs). Measure 8 cups of corn kernels.  In an 8- to 10-quart heavy kettle or pot combine corn and remaining ingredients. Bring to a boil; reduce heat and simmer for 30 minutes. Pack hot relish into hot jars, leaving 1/4 inch head space. Adjust two piece caps. Process 15 minutes in a boiling water canner. Yield: about 7 pints