Showing posts with label preserving. Show all posts

Jun 8, 2018

Pickled Asparagus

It's that time of year for asparagus!  This is the first year we've been mostly on top of the every-other-day asparagus picking.  We've been eating asparagus fresh, sautéed, grilled and roasted.  Yum!

My new thing this year was to try pickling asparagus.  I used my favorite pickling recipe, and I've got my first batch done.  Of course we had to try it right away.  It was delicious!  Pickle-y, with a nice crunch and great asparagus flavor.  A great way to use up your extra fresh asparagus!  I'll be making several more batches this year to preserve for the winter.


Mar 19, 2014

Canned Peaches

Are you tired of seeing my old posts from last fall?  I hope not, because I was really excited when I found this one about how to can peaches. 


I usually buy a "lug" or two of peaches from a local church - it is a good sized box of peaches that weighs about 25 pounds.


Ah, the beautiful peach!  It is best to use slightly under ripe peaches for canning, as overripe peaches have a bigger tendency to float. 


To remove the skins from each peach, I plunge them into a large pot of boiling water for 30 to 60 seconds -


then immediately plunge them into ice cold water.  This stops the cooking process.


Then, the skins should easily slip from each peach.  If they don't, you might have to kind of rub the peach to get the skins off.


Cut the peach in half, and twist to separate the halves.  Remove the pit and discard.  I also like to use a spoon and scrape out some of the fibers and red "stuff" from the center of the peach.


Now, it is time to make your simple syrup.  I make a light syrup, which is simply 2 1/4 cups sugar to 5 1/4 cups water.  Bring to a boil.  While this is happening, you could prep your jars.  I fill up my water canner with clean water, add my canning jars and bring the water to a simmer.   

After simple syrup comes to a boil, add the peeled peaches and simmer them in the simple syrup for about 2 minutes.

Use a slotted spoon to transfer the peaches from the liquid they were simmering in. Fill the jars with the fruit, leaving 3/4-inch head space between the top of the peaches and the rims of the jars. Pack the fruit in quite tightly, as this will help to reduce floating peaches after they are canned.

Ladle the hot simple syrup over the fruit, leaving 1/2-inch head space in each jar. Wipe the rims of the jars with a clean, damp paper or cloth towel, as any food on a jar rim may prevent a good seal. Secure canning lids and rings.


Process in a boiling water bath - 20 minutes for pint jars, 25 minutes for quarts.  Carefully remove your jars and set on a towel to cool.  The next day, check for proper seal and label!

Mar 18, 2014

Pickled Northern Pike

I have to confess, I am not a huge fan of herring or pickled fish - though Charlie loves that type of food.  When we first tried this pickled northern pike that a guy brought into work, however, we were both hooked.  Haha.... (ahem).

You really have to throw all previous thoughts of herring, pickled fish, ect... out of your mind before you try this recipe.  The fish is firm and not at all slimy, with such a delicious sweet tanginess from the brine  - and the fresh lemons and fresh onions finish it off nicely. 

We use northern pike in this recipe, though you could probably use most any freshwater fish - we heard that even pan fish and crappie make delicious pickled fish.


Ok, time to get started.  I use a large one gallon glass jar and pickling salt. The ratio is 4 cups water to 1 cup salt.


And, the fish.  I used some large northern pike fillets that someone gave us, and started by trimming each fillet of any scales or impurities.  By the way, no need to worry about having boneless fillets - this process of pickling dissolves the bones.  After the trimming, I cut each fillet into small bite sized pieces.


Place the fish chunks in your gallon jar.  As you can see, one batch of the salt/water isn't going to cut it.  I took a break from cutting up the fish to get another batch of salt/water dissolving in another bowl.  After the salt dissolved, I poured the mixture into the jar with the fish chunks.


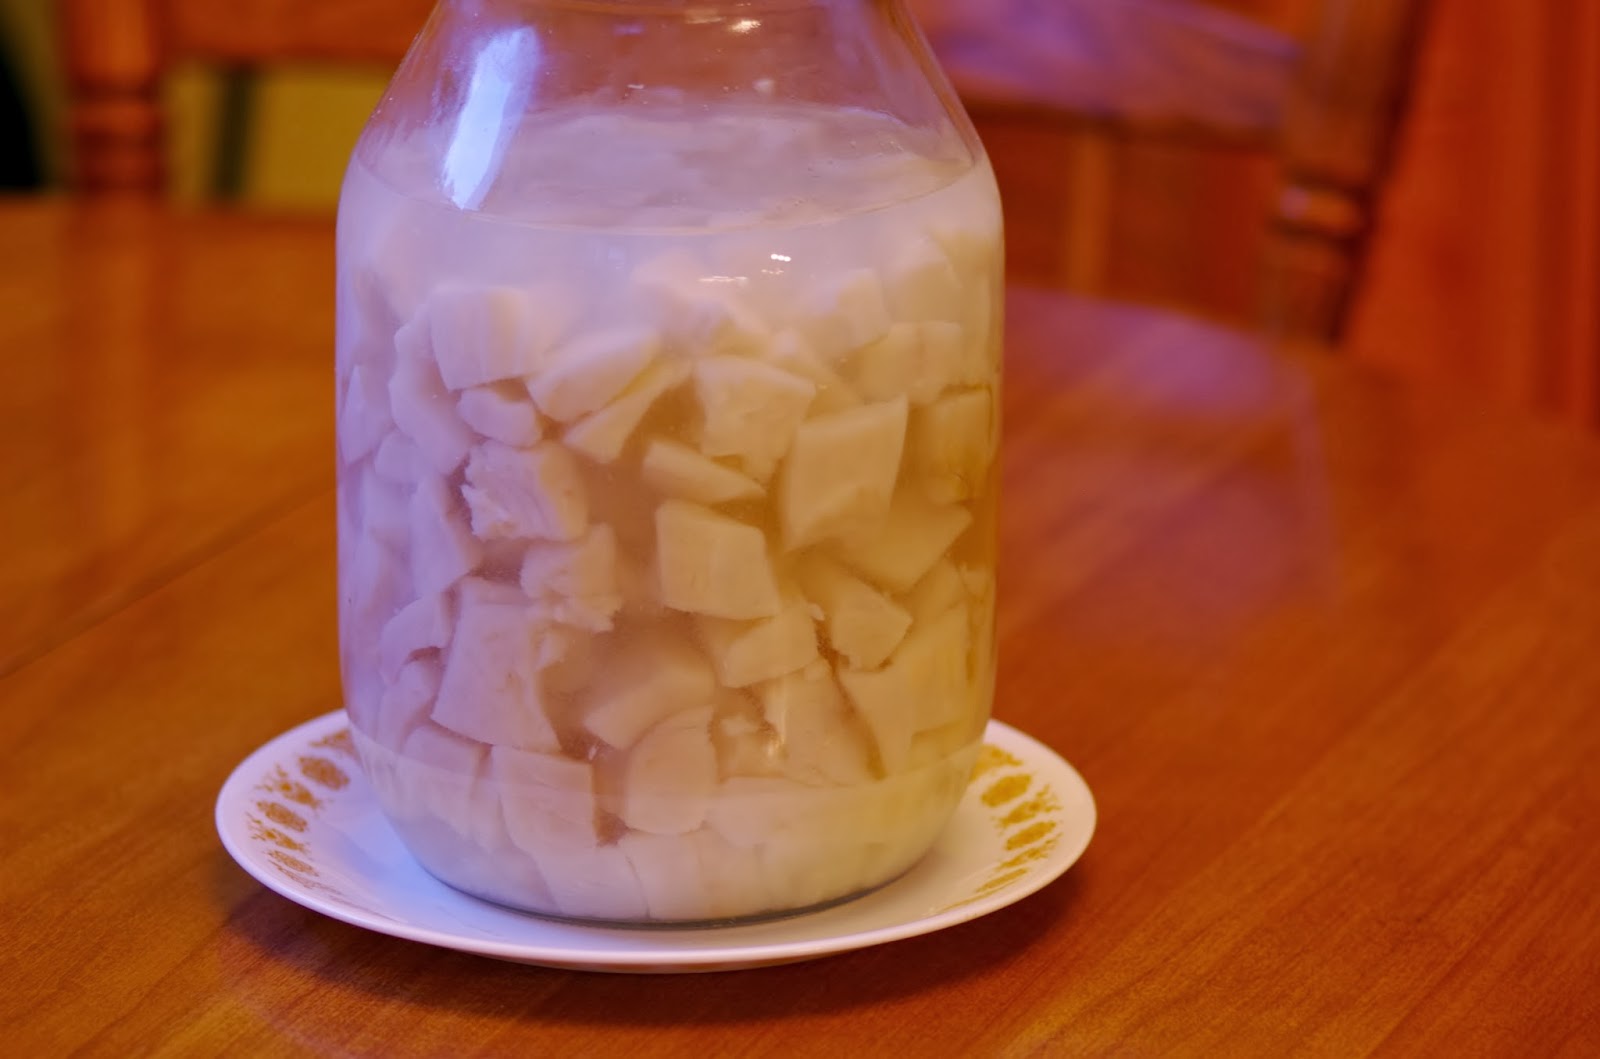
Since the fish likes to float, I put a little ramekin in the top of the jar to hold the fish under the salt water solution.  Refrigerate for 48 hours. 


After 48 hours, rinse the fish very well, and wash out your jar.  Put the fish back in the jar and completely cover it with white distilled vinegar.  Back into the fridge for 24 hours!


After 24 hours you will see that the previously translucent fish has turned white and the bones are dissolved.  Pour fish into a strainer, but don't rinse.  


Now, it is time to prepare your additional ingredients: fresh lemons, sliced thinly on the mandolin.


And thinly sliced onions.


Layer the fish chunks, onion slices and lemon slices in the jar and cover with Brine #2 (that is cooled and waiting; see following recipe).  Let set for two weeks, then enjoy!


Pickled Northern Pike


  • 2 to 4 pounds northern pike fillets, cut into bite sized pieces (no need to be boneless)
Brine #1
  • 4 cups water
  • 1 cup pickling salt 
Misc.
  • white distilled vinegar to cover fish (I would have a gallon jug around though)
Brine #2 
  • 2 cups white distilled vinegar
  • 1 cup white sugar
  • 2 teaspoons mustard seed
  • 4 bay leaves
  • 5 whole cloves
  • 1 teaspoon whole allspice
  • 1 teaspoon whole black pepper
  • 1 cup muscatel wine (I used 1/2 cup Shiraz and 1/2 cup pinot grigio, hence the pink color!)
 To bottle pickled fish:
  • 1 or 2 onions, thinly sliced
  • 1 or 2 lemons, thinly sliced

For brine #1, dissolve salt in water.  Place bite sized pieces of northern pike in crock or other large vessel, and cover with brine #1.  Depending on how much fish you have, you might need another batch of brine.  I recommend making it in another bowl, otherwise it is hard to dissolve the salt.  Pour over the fish until all the fish is coated.  Keep the fish submerged in the brine by weighting down a plate placed over the fish.  Refrigerate for 48 hours.

Drain and rinse until slimy feeling is gone from the fish.  Wash your jar and return the fish to the jar.  Completely cover fish with white distilled vinegar.  Place the weighted plate on fish again and refrigerate for 24 hours.  This part of the process dissolves the fish bones and turns the fish from translucent to white.

After 24 hours, when you are ready to finish your fish, start the Brine #2.  You will want it to cool completely before using so it is fine to start it a bit early.  Place all ingredients for the Brine #2 in pot and bring to a boil.  Let boil for 3 minutes.  Remove from heat and let cool.  Add the wine. 

Drain vinegar from fish and don't rinse the fish. 

To bottle your fish, place alternate layers of fish, lemon slices and onion slices in jars of your choice (I usually use pint canning jars).  Pour cooled brine into jar until everything is covered (I like to place a small strainer over the jar to pour the brine through to remove the spices - but this is up to you).

Refrigerate for about 2 weeks before enjoying!

Mar 11, 2014

Sauerkraut

Even though it is winter now, I would still like to share my sauerkraut making experiences from this last fall and previous falls.  Homemade sauerkraut really is easy to make, you just have to follow a few basic rules and have some time set aside! 


First, start with some good cabbages.  The cabbages grew great in the garden this last year.  Remove a couple of the outer leaves and quarter and core the cabbage.  Then, I used the shredding plate on my mandolin to finely shred each head of cabbage (please use protective gloves when working with the mandolin shredding plate - it is very very sharp!).  I believe I had 8 large heads of cabbage. 


As you can see, this is kind of a messy process. 


Pack the shredded cabbage into a clean crock with salt.


Then, you need to use your fists to smoosh the cabbage until you are able to make enough cabbage juice to cover your shredded cabbage.  When I started, my crock was full of fresh cabbage, and as I kept smooshing, I was able to extract more and more cabbage juice. 


After 4 to 6 weeks, the sauerkraut should be done (it depends on the temperature of your kitchen and how fast the sauerkraut ferments, too). 


Ladle into canning jars and water bath.  Done!


Homemade Sauerkraut


  • 25 pounds shredded cabbage (this should be about 6 - 8 heads)
  • about 1 cup of pickling salt
Cabbage needs to be thinly shredded.  I used the shredding plate on my mandolin, but you could also use a food processor with a slicing attachment, working in batches.  You can also use a sharp knife to thinly slice the cabbage (I have done that for many years).

Working in 5 pound batches, combine shredded cabbage and 3 Tbsp pickling salt in a large stone crock or glass or food-grade plastic container. Mix thoroughly. Let stand for 15 minutes or until juices start to flow and cabbage wilts slightly. Using a wooden spoon or your hands, press down firmly on the cabbage until the juice comes to the surface. Repeat four times, until all the cabbage is used up, leaving at least 4 inches of space between cabbage and rim of container. Sprinkle remaining pickling salt on top. If not enough juice has been produced to cover cabbage, you will need to add brine.  To make a bring, combine 4-1/2 tsp pickling or preserving salt and 4 cups water. Bring to a boil over medium-high heat, stirring to dissolve salt. Let cool to room temperature, then ladle over sauerkraut to cover.

Place a clean inverted plate over the cabbage mixture and weigh down with two or three quart jars that have been filled with water and capped. (It is important to keep the cabbage under brine by 1 to 2 inches throughout fermentation.) Cover with a clean heavy towel.  Let stand in a cool place. Every day, remove and discard any scum that has formed.  During fermentation, gas bubbles will form. When bubbling ceases, fermentation is complete.  Fermentation may take up to 6 weeks, depending on how warm your kitchen and also, variations in the cabbage itself.

I use the hot pack method to can my sauerkraut, as follows: Prepare your boiling water canner.  Heat jars and lids in simmering water until ready for use.  Do not boil lids.  Set bands nearby.

Bring sauerkraut, with brine, to a gentle simmer over medium-high heat in a large stainless steel saucepan.  It is important to not let this boil!  Pack hot sauerkraut and brine into hot jars leaving 1/2 inch headspace.  Remove air bubbles and adjust headspace, if necessary, by adding more brine. Wipe rim. Center lid on jar. Apply band until fit is fingertip tight.

Process quart jars in a boiling water canner for 15 minutes and pint jars for 10 minutes. Remove jars and cool.  Check lids for seal after 24 hours - to make sure it is sealed, the lid should not flex up and down when center is pressed.


Note: if you want to use the raw-pack method: prepare your boiling water canner. Heat jars and lids in simmering water until ready for use. Again, do not boil lids. Set bands nearby.

Pack the sauerkraut and brine (directly from the crock), into hot jars, leaving 1/2 inch headspace. Remove air bubbles and adjust headspace, if necessary, by adding brine.  Wipe rim.  Center lid on jar. Apply band until fit is fingertip tight.

Process quart jars in a boiling water canner for 25 minutes and pints 20 minutes. Remove jars and cool.  Check lids for seal after 24 hours - to make sure it is sealed, the lid should not flex up and down when center is pressed.

Mar 5, 2014

Wild Plum Juice with the Mehu-Lissa

I found this old post in my "ready to go file," and even though it isn't fall anymore, I thought I would still post it.

I was so excited on this day, because it was my first time using my new Mehu-Lissa steam juicer.  What is that, you wonder?  Here is a great explanation I found on the Mehu-Lissa website:

"Your Mehu-Lissa Steam Juicer will save you hours of work - No more squeezing or straining! We offer the highest quality 18/10 stainless steel craftsmanship and superior design for which Finland is World famous. You can make gallons of 100% pure, fresh juice and steam cook complete meals. A gentle steam process is used by Mehu-Liisa steam juicers to open the juice cells in fruit. Then the juice falls into the juice kettle and you drain it into bottles or jars. Never squeeze messy cheesecloth again! The 2012 model has about a 11.5 quart steamer basket for making larger batches of juice from fruits and berries."

The components of the Mehu-Lissa:


 Anyhow, I had heard about this steam juicer from several people and thought it sounded so wonderful!  Charlie bought it for me for a special gift - and I really think an investment as well. 

When we were driving home one day last fall, I happened to see a patch of trees near our house.  It filled with these gloriously beautiful, perfectly ripe wild plums.  I was so excited and the next day set out with my bucket.  There were so many plums I had to make several trips!

Once I got all the plums home, I decided that it was the perfect opportunity to use my Mehu-Lissa steam juicer to extract the plum juice. 


Aren't these plums such a beautiful color?


The amazing Mehu-Lissa.


The steam-collection pan, fitted with a heat-proof hose to easily fill your jars.


The washed fruit ready in the steamer basket.


The Mehu-Lissa working (sorry for the bad picture!) - here I am filling my hot sterilized jars with beautiful plum juice.  One great thing that I love about the Mehu-Lissa is that when you fill your jars with the juice, you are putting boiling juice into hot sterilized jars.  According to the instruction manual for the steamer, all you have to do is place your hot sterilized lids on the jars and they will can.  I did this with apple, grape and plum juices last fall and didn't have any jars not seal!


I will use this plum juice either to drink or to make jelly later this winter if need be. 


I am sure I will be sharing more about the Mehu-Lissa this coming fall!  


 I also made sugar free grape juice with our own grapes:


And apple juice as well!  The possibilities are endless!
 

Oct 23, 2013

Canned Corn

Part Three of the Corn Saga: Canned Corn.  Charlie and I prefer canned corn over frozen corn, so, I decided to can the rest of the corn from Grandma and Grandpa.


Start with a bunch of fresh-as-possible corn-on-the-cob.


Shuck the corn.  Remove husks and silks from corn cobs.  Try to get as many of the silks off of the corn as possible.  For cutting the cobs, if it helps, you can leave the bottom of the stalk attached so you have something to hold onto when cutting the kernels off.  I tend to cut off half a cob at a time, then flip it over and hold onto the other end while cutting off the remaining kernels.


Since we are canning whole kernel corn, all we have to do is to cut the kernels off the cob.  Cut corn from cob, making sure to not scrape the cob.  Transfer rinsed corn to a large bowl.


As I said before, this large bowl holds 42 cups of corn!


COMMERCIAL CANNING BREAK: This would be a good time to:
1) add water to your pressure canner, add a 1/4-ish cup of vinegar (I like to do this to keep the water clean and helps keep the inside of the canner clean) and start the heat on the canner. 
2) put a pot of water on to boil. This will be the water you pour over the corn after it’s in the jar.
3) Put your lids and rings into a small saucepan of water on low heat. These don’t need to boil, but they must get warm so the rubber softens.
COMMERCIAL CANNING BREAK OVER.


Ok, back to the corn!  Using canning funnel, spoon the corn into hot, sterilized jars - the jars have either been warming in a 170 degrees F oven or have just went through a wash cycle and are drying in the dishwasher or are simmering in the boiling water canner.  Following the raw pack method in the Ball Canning Book, I simply ladle the corn into the jars (I use pint jars, but feel free to use quarts).  Don’t pack the corn in the jar, just loosely fill up to the bottom of the neck of the jar.


Add 1/2 salt to each pint and 1 teaspoon salt to each quart.


Pour boiling water over corn, and use spatula or tool to make sure all the air bubbles are removed from each jar.  Leave an inch of headspace.  Wipe around the tops of all the jars with a clean towel, and add the lids and rings.  Transfer all the jars to the canner that has been heating up on the stove.


Since all pressure canners are different, make sure to read your manufacturers directions for your exact canner.  For my canner, I place the lid on the canner, and make sure to lock it in place.  Let the canner continue heating.  You will hear a lot of boiling going inside the canner, but that is just the sounds of the pressure building and is normal.  Don’t start counting your “processing” time until the pressure is at 10 lbs.  Once the 10 minutes is up, I turn the heat off and let the canner sit. You have to let the pressure inside the canner release which, for my canner, can take 30 minutes to an hour.  On my canner, the pressure gauge will slowly drop back down to zero.  At this time the lid can be removed - be very careful - there will be hot steam coming out of the canner!


Remove the jars from the canner and set them on a towel on the counter top with space in between them. Allow them to cool completely – they are very hot when they come out of the canner.


As the jars cool, you’ll hear lovely popping sound that says the jar has sealed. What happens if I am not around to hear the pop?  The lids have a slight circle indention (made that way) so you can visually see if the jar sealed.  If after cooling you are able to push the middle of lid up and down the jar has not sealed and should be used very soon.

Enjoy your canned corn this winter!


Oct 22, 2013

Fermented Dill Pickles

For years, I have been on the quest to make the perfect crispy, fermented dill pickle.  I've made bunches of batches, and they have ranged from salty enough to melt the ice from the sidewalks, to vinegary enough to wash the windows.  And pretty much all the time, they have been a soggy, limp, nasty consistency. 

But this is a new year!  With new research and new ideas!  So without further ado, I will share the (hopefully) Improved 2013 Fermented Dill Pickles recipe. 


First important ingredient: fresh cucumbers.  It is important to get fresh-picked-today small pickling cucumbers (not the slicing variety) because if you start out with soft cucumbers, the softness will only get worse with the pickling.


Next important step: take a tiny slice off the end that had the blossom.  Since it was sometimes hard to figure out which end to cut, I decided to slice off both ends.  This also created a more uniform look.


But why cut off the ends one at a time?  Let's do a bunch at once.  


Next, the fresh ingredients.  The first one of note is the fresh grape leaves.  This is a new technique for me this year, one I am trying based on my research.  I found out that adding fresh grape leaves to a crock of fermenting cucumbers adds tannin, which helps keep the pickles more crisp.  And also, I added fresh dill and (not pictured) garlic and onions. 


Next: the crock.  The crock needs to be cleaned, and totally free of contaminates and any fats or oils which can make for soft pickles.  Before filling, I wash my crock thoroughly, then run boiling water down the sides.  Then you can start filling by adding the fresh grape leaves, garlic, onions, and spices.


And ..... here they are!  Fermented dill pickles, packed into jars.  I let the crock sit for about a month, and the pickles ended up a little soft - but the flavor was good!  So I would recommend letting these sit for one to two weeks, then put them in jars and refrigerate them.


Fermented Dill Pickles


Brine
  • 1 gallon water
  • 1 cup kosher salt
  • 2 cups cider vinegar
  • 1 cup white vinegar
  • 1 tsp alum
In Crock:

  • 1 cup pickling spice
  • 4 fresh grape leaves
  • 1 bulb garlic, peeled
  • 2 onions, sliced
  • 2 or 3 dill weed heads
  • 1 garlic scape
  • 5-6 pounds baby cucumbers, scrubbed and blossom end trimmed

Lay "in crock" items in the bottom of your cleaned crock, and place the cucumbers on top.  In another large bowl, mix together brine ingredients and stir until the salt is dissolved.  Pour over cucumbers.

Let sit for one to two weeks, then pack into jars and refrigerate.