
hi

Showing posts with label appetizer. Show all posts
Showing posts with label appetizer. Show all posts
Apr 3, 2014
Proscuitto Wrapped Fresh Ginger Dates with Balsamic Reduction
My parents recently went on a short trip to southern California to visit my grandma. One of the treats they brought back with them were some California dates. I was so excited about them, and wanted to make something that really showcased the dates.
I had some prosciutto in the freezer, and decided I wanted to make prosciutto wrapped dates. But what else could I do to make them a little more special? Hmmmm... I decided to make a little cream cheese filling.
Mar 16, 2014
Easy Mexican Dip Appetizer
My family has made this Mexican dip for years, and it is one of those recipes we keep going back to. It is a great appetizer that serves a lot of people. It is also easy to change it up - top it with some olives, add some green onions, add some green chili or whatever you would like!

In the bottom of a 9x13 pan, layer in order:
Mexican Dip
In the bottom of a 9x13 pan, layer in order:
- One 16-ounce can refried beans, lightly salted
- Two mashed avocados mixed with 1 cup sour cream (use light or fat free if desired!)
- Sprinkle with 1/2 to 1 chopped onion (depending on taste)
- Sprinkle with 1 chopped tomato (optional)
- Spread with 1 to 1 1/2 cups thick and chunky salsa
- Top with 2 cups cheddar cheese
Feb 22, 2014
Smoked Salmon Caper Appetizers
I just had to share these little appetizers, which are some of Charlie's favorite appetizers. The bonus is, they are incredibly easy!
I do have a confession, though: this particular batch of "appetizers" weren't actually appetizers, we made them and ate them for supper one night. They actually were great for a nice, light supper!

I do have a confession, though: this particular batch of "appetizers" weren't actually appetizers, we made them and ate them for supper one night. They actually were great for a nice, light supper!
Jan 3, 2014
Crab Rangoon
One of the tasty appetizers we had during the holiday season was Crab Rangoon. We love the combination of crab meat, cream cheese, green onions and other flavorings. The tasty filling mixture is folded up in a wonton wrapper and deep fried (how can you go wrong deep frying something?). We like Crab Rangoon served with duck sauce, but they would also be tasty with soy sauce or any other Asian sauce or dip. Have fun and experiment!

You start with a regular little wonton wrapper.

Put a dollop of filling in the middle. Then, using your fingers, brush two of the sides with a beaten egg (I know this shows four sides brushed with egg wash, but this was the first one I did. After a couple, Charlie mentioned that the wrapper probably needed the "glue" only on two sides - and he was right! It worked much better and the wonton wrapper a lot less slippery to press together).

Then, fold over a corner and press it to the opposite corner, making a triangle shape.

Then - gently! - working the air out from around the filling, press the remaining two sides together.

Then deep fry for three to four minutes (not pictured because I didn't want to get oil splattered on the camera) and enjoy!


Heat oil in a large heavy-bottomed pot over medium-high heat until it registers 350 degrees F. In a medium bowl, combine the cream cheese, crab meat, green onions, salt, sesame oil, chili sauce, soy sauce and Worcestershire sauce.
Now it is time to assemble the appetizer. On a flat, clean surface, lay out a wonton wrapper with one corner pointed toward you. Place one tablespoon of the filling into the center of the wonton wrapper. Dip a finger into the egg wash mixture and wet two edges of the wonton wrapper. Fold the top corner down to meet the bottom corner to form a triangle. Press out all of the air and seal the edges by pressing them together. Place finished crab rangoons on a cookie sheet or platter, covering the appetizers with a damp kitchen towel to keep them from drying out.
When your oil is heated and you are ready to fry, line a baking sheet with a double layer of paper towels. Place a wire rack upside down on top of the paper towels. Carefully lower crab rangoons into the oil, five or six at a time, and fry, until they are golden brown on both sides. This will take three or four minutes. Make sure to turn them over once halfway through the cooking time. Remove with a slotted spoon and drain on the prepared baking sheet. Allow the crab rangoons to cool for at about five minutes before serving - they are very hot when they come out and even though it is hard to wait, I would highly recommend it (coming from a voice of experience). Serve with duck sauce, soy sauce, any sauce of your choice or no sauce at all and enjoy!

You start with a regular little wonton wrapper.

Put a dollop of filling in the middle. Then, using your fingers, brush two of the sides with a beaten egg (I know this shows four sides brushed with egg wash, but this was the first one I did. After a couple, Charlie mentioned that the wrapper probably needed the "glue" only on two sides - and he was right! It worked much better and the wonton wrapper a lot less slippery to press together).

Then, fold over a corner and press it to the opposite corner, making a triangle shape.

Then - gently! - working the air out from around the filling, press the remaining two sides together.

Then deep fry for three to four minutes (not pictured because I didn't want to get oil splattered on the camera) and enjoy!


Crab Rangoon
- 8 ounces cream cheese, softened
- 8-ish ounces canned or refrigerated crab meat
- 1/2 cup green onions, thinly sliced
- 1/2 teaspoon salt
- 2 teaspoons sesame oil
- 1 teaspoon Thai Sweet Chili sauce
- 1 tablespoon soy sauce
- 2 teaspoons Worcestershire sauce
- 1 package wonton wrappers (about 48)
- 1 egg, beaten with 1 tablespoon water
- 2 to 3 quarts peanut, vegetable or canola oil (for frying)
- duck sauce (or dipping sauce of choice)
Heat oil in a large heavy-bottomed pot over medium-high heat until it registers 350 degrees F. In a medium bowl, combine the cream cheese, crab meat, green onions, salt, sesame oil, chili sauce, soy sauce and Worcestershire sauce.
Now it is time to assemble the appetizer. On a flat, clean surface, lay out a wonton wrapper with one corner pointed toward you. Place one tablespoon of the filling into the center of the wonton wrapper. Dip a finger into the egg wash mixture and wet two edges of the wonton wrapper. Fold the top corner down to meet the bottom corner to form a triangle. Press out all of the air and seal the edges by pressing them together. Place finished crab rangoons on a cookie sheet or platter, covering the appetizers with a damp kitchen towel to keep them from drying out.
When your oil is heated and you are ready to fry, line a baking sheet with a double layer of paper towels. Place a wire rack upside down on top of the paper towels. Carefully lower crab rangoons into the oil, five or six at a time, and fry, until they are golden brown on both sides. This will take three or four minutes. Make sure to turn them over once halfway through the cooking time. Remove with a slotted spoon and drain on the prepared baking sheet. Allow the crab rangoons to cool for at about five minutes before serving - they are very hot when they come out and even though it is hard to wait, I would highly recommend it (coming from a voice of experience). Serve with duck sauce, soy sauce, any sauce of your choice or no sauce at all and enjoy!
Nov 8, 2013
Fried Green Tomatoes
Ever since I was young, I can remember my Grandma Lois making fried green tomatoes. When I was quite young, I was told teasingly, "fried green tomatoes for grown-ups!" Of course, this only made me want to eat them more! Whenever I did get to eat fried green tomatoes, I loved them. Now, I get to make them for my husband.
The star of the show - the green tomato.

The star of the show - the green tomato.

Oct 3, 2013
Stuffed Mushrooms
Mushrooms are something that I never liked when I was a kid. However, in the last year or so, I have been looking - yes, looking for opportunities to eat mushrooms - because they are a food I want to learn to eat (yes, I know I am weird). Anyhow, a couple of days ago, I was really really in the mood for some stuffed mushrooms. I wanted them to be creamy, mushroom-y, with just a little bite. I am happy to say that this recipe was a success!
First, I gently washed some baby portabella mushrooms. I know there is quite a debate on whether or not to wash mushrooms, but I tend to lean to the side of gently washing them vs. not. Alton Brown did a segment on his show Good Eats quite a while ago where he weighed washed and unwashed mushrooms, and came to the conclusion:
a) the weight difference between the washed and unwashed mushrooms was negligible and
b) since the weight difference was negligible, it is nicer to not have dirt on your mushrooms.
So, ever since then, I gently wash my mushrooms under cool running water and let them dry a bit in a colander.

Then, I used the end of a spoon and scooped/pulled out the stem of the mushroom. I like to finely chop these stems and add them to my filling for a little extra texture, body and nutrients. Yes, mushrooms do actually have nutrients - selenium, potassium, riboflavin, niacin and vitamin D are some of the more famous nutrients mushrooms boast.

By the way - NOT that I am trying to sell things for any particular company or anything, but I love my hand food chopper! I use it right on my cutting board. All you have to do is gather what you want chopped inside the little bell, give it five or six good chops and that is it! Look at that nice pile of chopped mushroom stems. I love time-saving tools like this in my kitchen.

I added cream cheese, crumbled blue cheese, some grated horseradish, fresh minced garlic, and chopped celery, olives and bacon and put the mixture in a quart bag.

It is so easy to just snip the corner of the baggie and fill the mushroom caps.

I decided to experiment and top a few of the mushrooms with bread crumbs and I left a few plain.

Bake the mushrooms - done! I honestly couldn't tell the difference in texture or flavor between the breadcrumb or the non-bread crumbed stuffed mushrooms. The difference I did notice was that the mushrooms with the breadcrumbs didn't melt all over the bottom of the pan, so, I decided I liked using the breadcrumbs.

Preheat oven to 350 degrees F. Gently wash mushrooms if desired. Remove stems and chop finely. Line an 8x8 dish with tinfoil or parchment and lay out the mushrooms stem side up. In a medium mixing bowl stir together the cream cheese, blue cheese, garlic, horseradish, bacon, celery, olives and salt if desired. Mix well.
First, I gently washed some baby portabella mushrooms. I know there is quite a debate on whether or not to wash mushrooms, but I tend to lean to the side of gently washing them vs. not. Alton Brown did a segment on his show Good Eats quite a while ago where he weighed washed and unwashed mushrooms, and came to the conclusion:
a) the weight difference between the washed and unwashed mushrooms was negligible and
b) since the weight difference was negligible, it is nicer to not have dirt on your mushrooms.
So, ever since then, I gently wash my mushrooms under cool running water and let them dry a bit in a colander.

Then, I used the end of a spoon and scooped/pulled out the stem of the mushroom. I like to finely chop these stems and add them to my filling for a little extra texture, body and nutrients. Yes, mushrooms do actually have nutrients - selenium, potassium, riboflavin, niacin and vitamin D are some of the more famous nutrients mushrooms boast.

By the way - NOT that I am trying to sell things for any particular company or anything, but I love my hand food chopper! I use it right on my cutting board. All you have to do is gather what you want chopped inside the little bell, give it five or six good chops and that is it! Look at that nice pile of chopped mushroom stems. I love time-saving tools like this in my kitchen.

I added cream cheese, crumbled blue cheese, some grated horseradish, fresh minced garlic, and chopped celery, olives and bacon and put the mixture in a quart bag.

It is so easy to just snip the corner of the baggie and fill the mushroom caps.

I decided to experiment and top a few of the mushrooms with bread crumbs and I left a few plain.
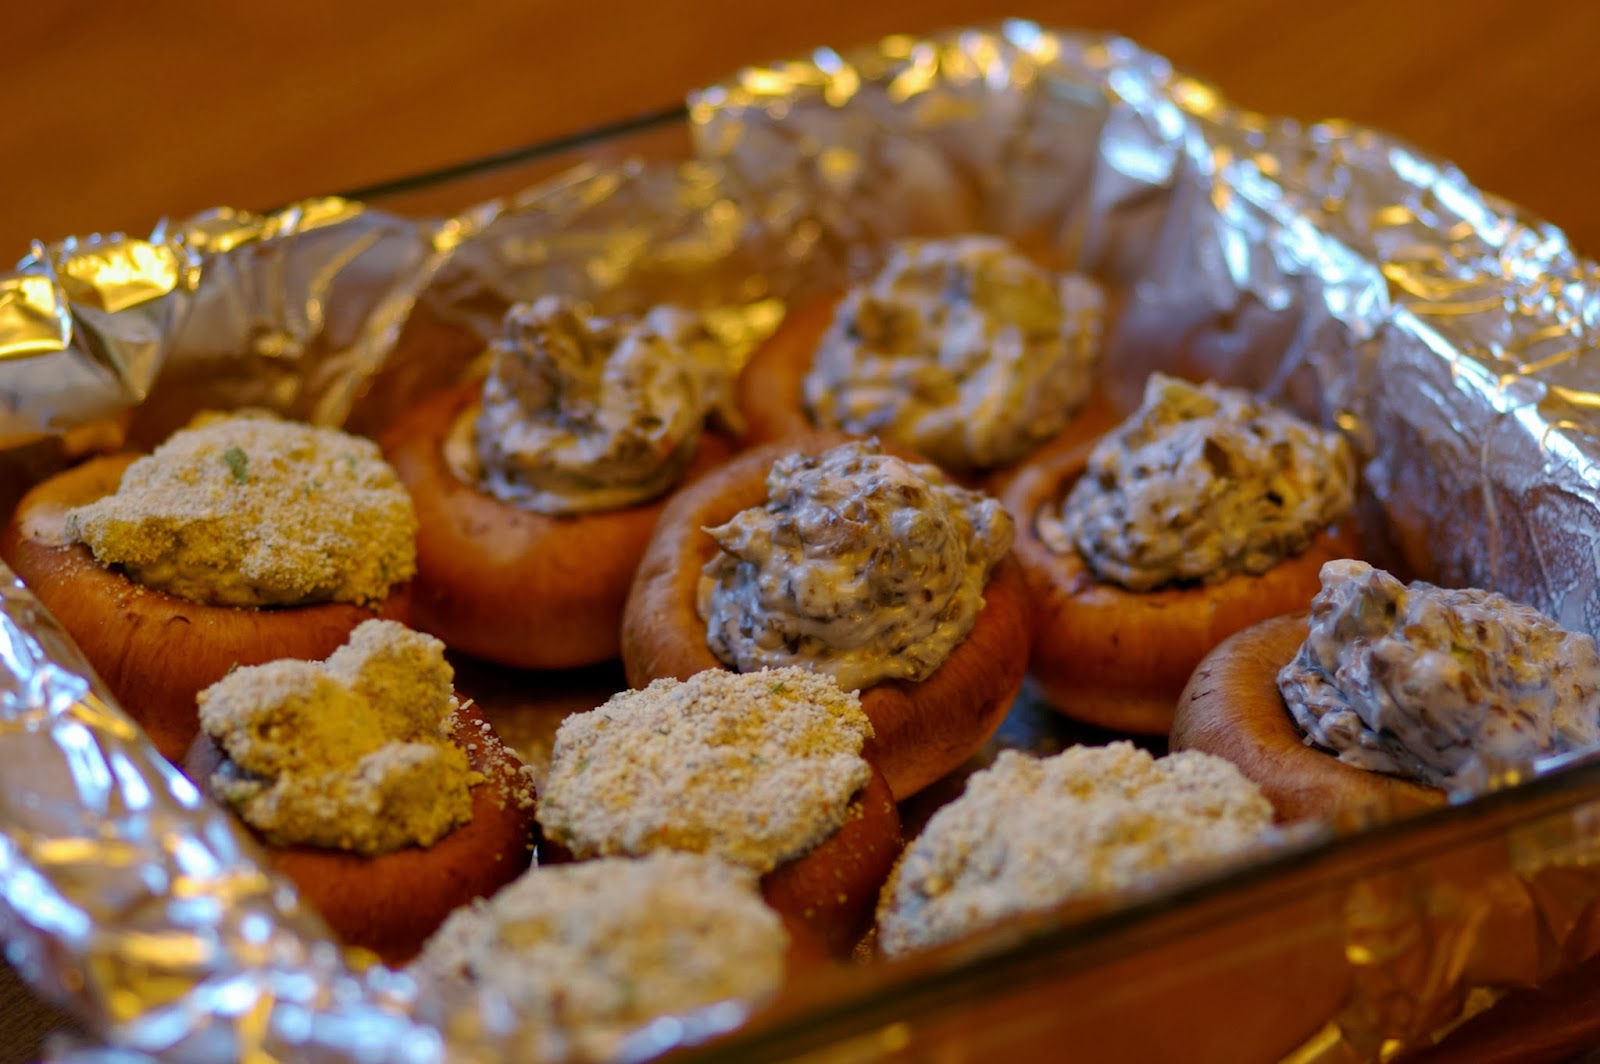
Bake the mushrooms - done! I honestly couldn't tell the difference in texture or flavor between the breadcrumb or the non-bread crumbed stuffed mushrooms. The difference I did notice was that the mushrooms with the breadcrumbs didn't melt all over the bottom of the pan, so, I decided I liked using the breadcrumbs.

Stuffed Mushrooms
- 9 baby portabella mushrooms
- 4 ounces cream cheese, softened
- 2 ounces blue cheese, crumbled
- 2 or 3 garlic cloves, minced
- 1/2 teaspoon grated horseradish
- 2 slices bacon, chopped fine
- 1/4 cup sliced celery, chopped fine
- 1 tablespoon chopped olives
- salt to taste, if desired
- 1/3 cup bread crumbs
Preheat oven to 350 degrees F. Gently wash mushrooms if desired. Remove stems and chop finely. Line an 8x8 dish with tinfoil or parchment and lay out the mushrooms stem side up. In a medium mixing bowl stir together the cream cheese, blue cheese, garlic, horseradish, bacon, celery, olives and salt if desired. Mix well.
Divide the cream cheese/mushroom mixture evenly between the
mushrooms, then sprinkle the bread crumbs evenly over the mushrooms. Bake
mushrooms in a 350˚ oven for 18-20 minutes or until tops are browned, and let
them rest 5 minutes before eating.
Preheat oven to 350˚. Line a baking tray with parchment paper and lay out your mushrooms stem side up. In a medium mixing bowl stir together the cream cheese, blue cheese, horseradish and milk. Add the garlic and bacon, mixing well.
Divide the cream cheese mixture evenly between the mushrooms, then sprinkle the bread crumbs evenly over the mushrooms. Bake mushrooms in a 350˚ oven for 18-20 minutes or until tops are browned, and let them rest 5 minutes before eating.
- See more at: http://mushroominfo.com/bacon-blue-cheese-stuffed-mushrooms/#sthash.7MyeVEdn.dpu
Divide the cream cheese mixture evenly between the mushrooms, then sprinkle the bread crumbs evenly over the mushrooms. Bake mushrooms in a 350˚ oven for 18-20 minutes or until tops are browned, and let them rest 5 minutes before eating.
- See more at: http://mushroominfo.com/bacon-blue-cheese-stuffed-mushrooms/#sthash.7MyeVEdn.dpu
Sep 7, 2013
Shrimp Cocktail
Charlie and I love shrimp. It is what we consider a "special treat -" to us, that means we only buy shrimp once a month or once every couple of months. So when we do get to eat shrimp, it really is both a special occasion and a treat!
One of our favorite ways to cook shrimp is to use Alton Brown's brining and broiling technique - the brine in particular is really what makes all the difference. The shrimp come out plump, juicy and bursting with flavor. In fact, they really don't need any cocktail sauce at all.
The raw, shell on, deveined shrimp rinsed and ready for the brine.

I do the brining in a gallon plastic bag - so easy and I don't have to worry about washing and sanatizing a raw-shellfish-bowl when the brining is done!

The shrimp and ice cubes brine for 20 minutes. As you can see I got as much air out of the bag possible - kind of an at-home 'cryovac infusion' technique.

The shrimp removed from the brine, tossed in a little olive oil and laid out on a tin-foil lined cookie sheet.

The shrimp right out from under the broiler - and into an ice cold bowl they go! The object is to stop the cooking process immediately.

The lucious shrimp cocktail.

Hey! Whose hand is that??? I'm still taking pictures! [Charlie was excited to enjoy some shrimp.]

Have you ever tried brining shrimp? What did you think? Please let me know your thoughts on this recipe if you try it!
Make sure the shrimp are deveined. Place shrimp in a gallon plastic bag, or large bowl. Add all remaining ingredients except the olive oil and dash of Old Bay Seasoning. Swoosh the bag around a little until the sugar and salt is dissolved. Refrigerate mixture for 20 to 25 minutes - don't let the shrimp sit in the brine any longer, though, as they will get too salty (voice of experience speaking here). While shrimp are brining, place a baking sheet or broiler pan under oven broiler and preheat for 5 minutes. Remove shrimp from brine and drain thoroughly. Rinse the shrimp under cold water and dry on paper towels. In a large bowl, toss shrimp with olive oil and sprinkle with Old Bay seasoning, if desired.
Place shrimp onto a sizzling sheet pan and return to broiler immediately. After two minutes, turn the shrimp with a pair of tongs. Return the shrimp to broiler for one minute. Transfer to the cold cookie sheet and refrigerate immediately, until shrimp have cooled completely.
Once shrimp have chilled, arrange them in a martini glass with cocktail sauce or as desired.
One of our favorite ways to cook shrimp is to use Alton Brown's brining and broiling technique - the brine in particular is really what makes all the difference. The shrimp come out plump, juicy and bursting with flavor. In fact, they really don't need any cocktail sauce at all.
The raw, shell on, deveined shrimp rinsed and ready for the brine.

I do the brining in a gallon plastic bag - so easy and I don't have to worry about washing and sanatizing a raw-shellfish-bowl when the brining is done!

The shrimp and ice cubes brine for 20 minutes. As you can see I got as much air out of the bag possible - kind of an at-home 'cryovac infusion' technique.

The shrimp removed from the brine, tossed in a little olive oil and laid out on a tin-foil lined cookie sheet.

The shrimp right out from under the broiler - and into an ice cold bowl they go! The object is to stop the cooking process immediately.

The lucious shrimp cocktail.

Hey! Whose hand is that??? I'm still taking pictures! [Charlie was excited to enjoy some shrimp.]

Have you ever tried brining shrimp? What did you think? Please let me know your thoughts on this recipe if you try it!
Brined Shrimp
- 1 pound frozen deveined, shell-on shrimp, thawed (for this recipe, I use either jumbo or extra large shrimp)
- 1/4 cup kosher salt
- 1/4 cup sugar
- 1 cup water
- 1/2 to 1 teaspoon Old Bay Seasoning
- 1/2 teaspoon garlic powder
- 2 cups ice
- Olive oil
- Dash Old Bay Seasoning
Make sure the shrimp are deveined. Place shrimp in a gallon plastic bag, or large bowl. Add all remaining ingredients except the olive oil and dash of Old Bay Seasoning. Swoosh the bag around a little until the sugar and salt is dissolved. Refrigerate mixture for 20 to 25 minutes - don't let the shrimp sit in the brine any longer, though, as they will get too salty (voice of experience speaking here). While shrimp are brining, place a baking sheet or broiler pan under oven broiler and preheat for 5 minutes. Remove shrimp from brine and drain thoroughly. Rinse the shrimp under cold water and dry on paper towels. In a large bowl, toss shrimp with olive oil and sprinkle with Old Bay seasoning, if desired.
Place shrimp onto a sizzling sheet pan and return to broiler immediately. After two minutes, turn the shrimp with a pair of tongs. Return the shrimp to broiler for one minute. Transfer to the cold cookie sheet and refrigerate immediately, until shrimp have cooled completely.
Once shrimp have chilled, arrange them in a martini glass with cocktail sauce or as desired.
Aug 20, 2013
Antipasto Platter
Antipasto platters are a great idea to add to your recipe box. Technically an appetizer that is great to share with a group, Charlie and I also love antipasto platters for a casual, relaxed dinner-for-two. The ingredients are flexible, can be based on what you have on hand and your personal food preferences. In this post, I'll share our favorite ingredients.
This was the most recent antipasto platter I made (from left to right: Dubliner cheese, prosciutto, garlic olives, fresh red pepper slices, fresh mozzarella cheese, fresh asparagus tips, Genoa salami, fresh sweet onions, kalamata olives, capicola, and feta cheese slices).

Over the last couple of years, we have made quite a few antipasto platters with varying ingredients. And we love to try new things! For some ideas to get started, our favorite ingredients are:
Cheeses: Served on the platter, rolled, layered, sliced, or cubed. Choose two to four (note: these suggested amounts of each group can be adjusted based on your number of guests).
- Fresh mozzarella
- Feta slices
- Dubliner
- Chevre (goat cheese)
- Blue cheese
- Genoa salami
- Various hard salami's
- Prosciutto
- Capicola
- Smoked ham
- Other favorite cured meats
Salty: Served on the platter or in small bowls arranged in the platter. Choose two or three.
- Garlic stuffed olives
- Kalamata olives
- Misc. other olives
- Artichoke hearts
- Fresh red sweet pepper, sliced
- Fresh onions, sliced (yellow usually)
- Cherry or grape tomatoes
- Roasted red peppers
- Sliced peperoncini peppers
- Raw asparagus tips
- Mushrooms
- Green onions
- Hard boiled egg slices
- Toasted walnuts
- Various cracker varieties
- Water crackers
- Rustic bread slices or loaves
Antipasto Dressing
A "dressed" antipasto platter. This antipasto platter had celery, which we found wasn't a favorite antipasto platter vegetable.

This antipasto platter was a little too heavily dressed - still tasty though. We had some Swiss cheese and cucumbers on this antipasto platter which also weren't favorites.

What do you like to put on your antipasto platters?
Aug 5, 2013
Bacon Wrapped Scallops
I was raised in a family where birthday meals were special. The special birthday person always got to pick their favorite meal for the birthday dinner. Recently, it was Charlie's birthday, and for his birthday meal, he requested scallops. I found some tasty, large scallops at our local fish market for a great price. I decided to wrap them in bacon for an added treat.
Wrapping each scallop in thick-sliced bacon.

Then, into the oven for about 20 minutes. The cooked scallops and bacon were amazing and such a treat.

The next morning, I made Charlie a special breakfast - over-easy eggs, toast with homemade strawberry jam, [leftover] bacon wrapped scallops and fresh fruit. He was pretty happy.

Note: if you want crisp bacon, use regular sliced. If you like your bacon a little soft, use the thick cut strips.
Wrapping each scallop in thick-sliced bacon.

Then, into the oven for about 20 minutes. The cooked scallops and bacon were amazing and such a treat.

The next morning, I made Charlie a special breakfast - over-easy eggs, toast with homemade strawberry jam, [leftover] bacon wrapped scallops and fresh fruit. He was pretty happy.

Bacon Wrapped Scallops
- 12 slices thick-cut bacon
- 12 medium/largish sized scallops
- Salt
- Pepper
- Toothpicks
Preheat oven to 375 degrees F. Place a wire rack in a cookie sheet. Wrap a strip of bacon around each scallop; secure with toothpick (most of the way through the scallop). Arrange the wrapped scallops on the wire rack. Bake on the middle rack for 15 to 20 minutes (or until the scallops are done and the bacon is cooked). Remove toothpicks and enjoy! There are many sauces that can be prepared for this dish, but Charlie loved just the simple kosher salt and fresh-ground black pepper for seasoning.
Note: if you want crisp bacon, use regular sliced. If you like your bacon a little soft, use the thick cut strips.
Roasted Aparagus Bruchetta
Sooooo, I had a bunch of cherry tomatoes laying around, and I didn't know what to do with them. As I was rummaging around the kitchen, I soon found some leftover roasted asparagus, a bruschetta loaf and some miscellaneous cheese. Voila! Roasted Asparagus Bruschetta was born, perfect for an appetizer or a refreshing light dinner.

The roasted asparagus topping. Hint: it was also tasty with tortilla chips....

The chopped cherry tomatoes, sweet peppers, onions and garlic.

Crunchy bread, flavorful salsa and just-melted cheese. Charlie thought these were delicious, and I did too.


The roasted asparagus topping. Hint: it was also tasty with tortilla chips....

The chopped cherry tomatoes, sweet peppers, onions and garlic.

Crunchy bread, flavorful salsa and just-melted cheese. Charlie thought these were delicious, and I did too.

Roasted Asparagus Bruschetta
For salsa:- 1 1/2 cups chopped cherry tomatoes
- 1/2 cup finely chopped onions
- 1/2 cup finely chopped mixed sweet peppers
- 1 cup chopped roasted asparagus
- 3 basil leaves, finely chopped
- 2 garlic cloves, minced
- 1 tablespoon cider vinegar
- 1 tablespoon red wine vinegar
- 1 tablespoon rice vinegar
- 1 tablespoon honey
- 1 tablespoon olive oil
- 1/4 teaspoon cumin
- about 1 tablespoon fresh squeezed lemon juice
- dash pepper and salt
- 1 bruschetta loaf
- provolone cheese (probably about 8 slices?)
- dash of Parmesan cheese
Jun 28, 2013
Pickled Eggs
Pickled eggs… sounds like they could be scary! A couple of years ago I tried one with much trepidation, and found, to my delight, that they were delicious! Now I always try to have a jar of them on hand in the refrigerator, just for a snack or chopped up for a great salad topping, ect…

18 hard cooked eggs, peeled
1 1/2 cups vinegar
2 cups water
1 tablespoon sugar
2 teaspoons salt
2 teaspoons peppercorns
16 whole cloves
2 bay leaves
1 dried chili pepper
Place the hard cooked eggs in a jar. In a small saucepan, combine the other ingredients. Cover and bring to a boil. Simmer for 15 minutes over low heat. Strain liquid and cool to room temperature. Cover eggs with the vinegar solution. Cover with a lit and let stand in the refrigerator for at least two days before using. I find that letting them sit for about a week is best. Makes 18 pickled eggs.


Pickled Eggs

Subscribe to:
Posts (Atom)