
What is an earth oven, you might ask? Charlie first heard about it on a radio cooking show called "The Splendid Table." Lynn Rossetto Kasper was interviewing this man named Kiko Denzer, who wrote a book called, "Build Your Own Earth Oven." If you are at all interested in building your own earth oven, I highly recommend this book, which costs just $12.84 on Amazon (see link).
Simply put, an earth oven is a cooking structure made from earth. Even though it is quite a bit of work, one of the nice things about this oven is that it was almost free to make. The only expense we had were the fire bricks and the cement mix. Everything else we scavenged - from digging the clay out of our backyard, to digging the retaining wall bricks out of an old pile of stuff, to finding a perfect (free!) roof!
Now, before we begin - I just wanted to make mention that even though you won't see me in any of these photos, I was right alongside helping all the way - I was elected as 'photographer' to document the process!
And now, to begin: we decided to put the earth oven right outside our front door. That way, we thought, it will be easy to bring the food out and back in.
As you can see from the below picture, by the time I decided to start photographing the process, we had already begun. Better late than never, right?
This picture shows the form dug into the ground, ready for the concrete slab.


Here, Charlie is beginning to place the rebar which will reinforce the concrete.

The rebar is placed.

Time to mix the concrete!

I guess we need a few more batches.

There we go!

Time to smooth the concrete pad.


Beautiful!

After the concrete pad was well dried, it was time to build the "plinth" - a structure that brings the floor of the actual oven to a good working height. You could build the earth oven on the ground, but we decided it would be a pain to be cooking on our knees! As we built the plinth with the retaining blocks, we added "fill" to the center - pea rock, gravel and even old concrete chunks - anything we could find to fill it up.

We are getting there!

Here is Charlie and my Dad holding up a great find - an aluminum satellite dish that Charlie found. This will end up being the roof.

It is important for the earth oven to have a roof, otherwise, rain could wash away the cob mixture.

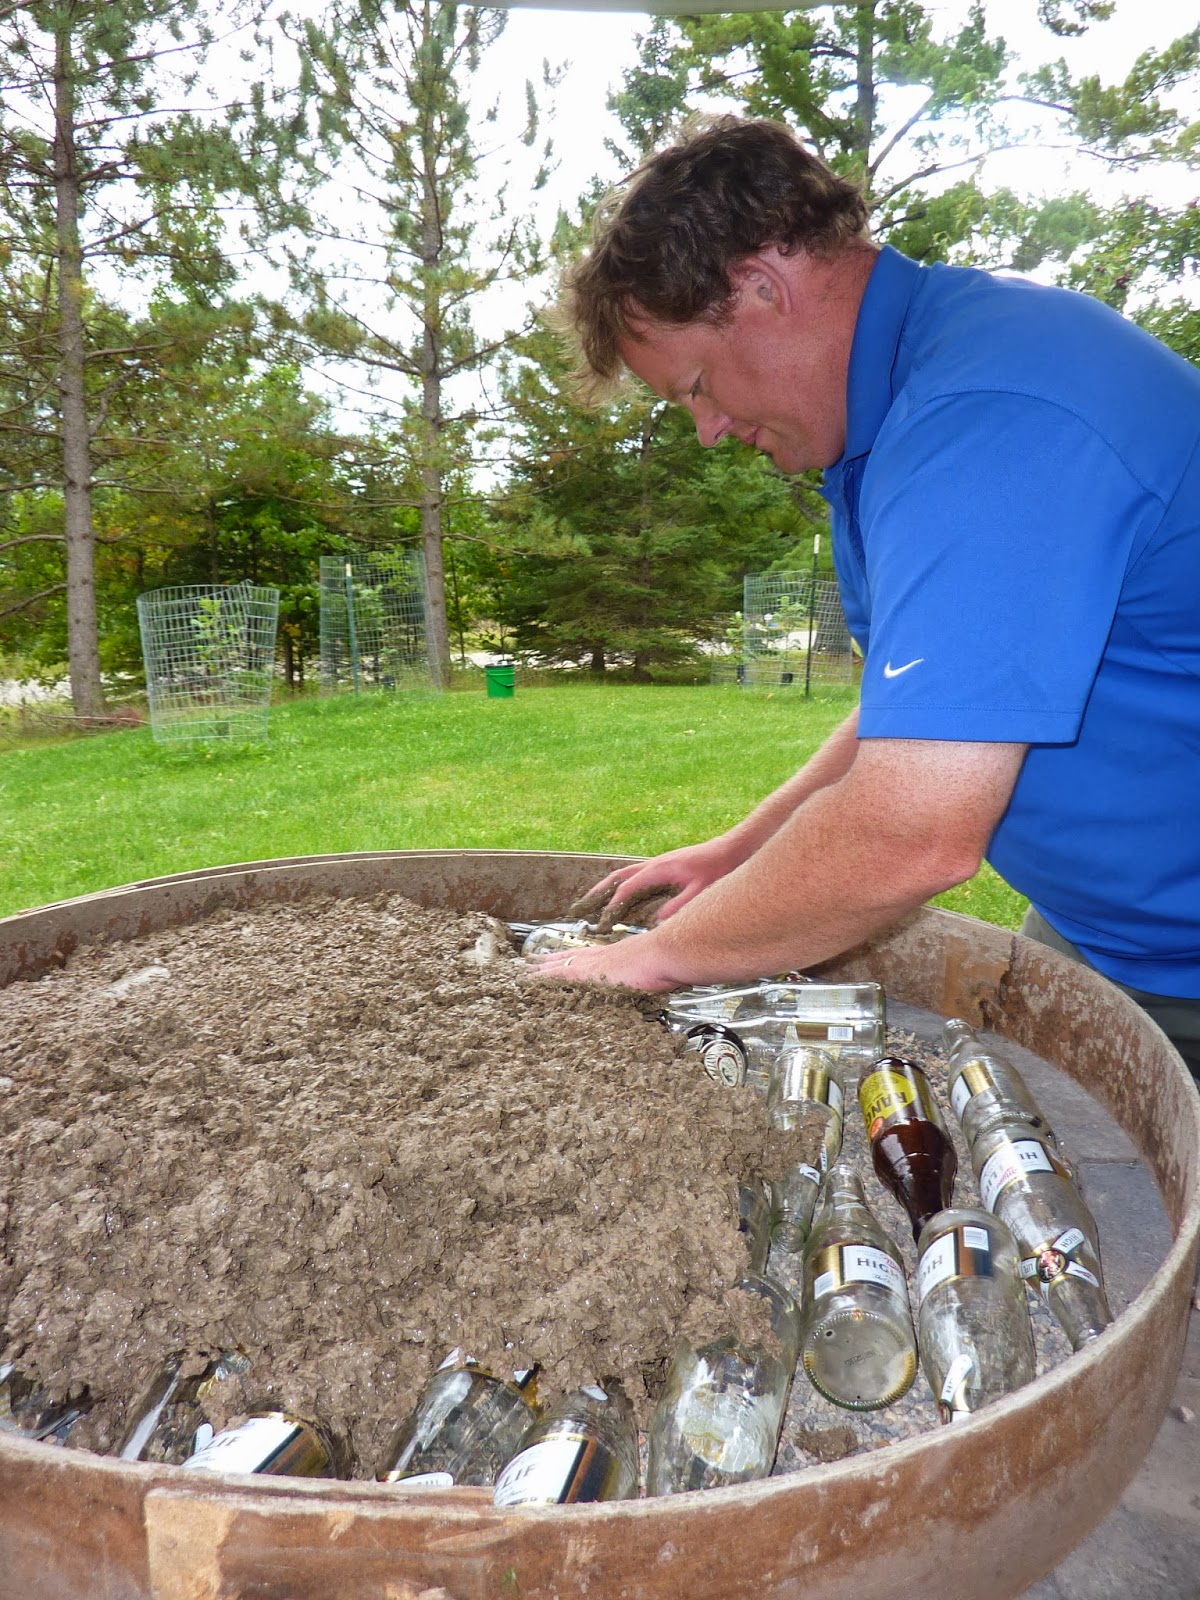
Now, it is time to make the bottom insulating layer. Charlie built another form, and inside this form are empty glass bottles for extra insulation.


Getting as many bottles as we can in there.

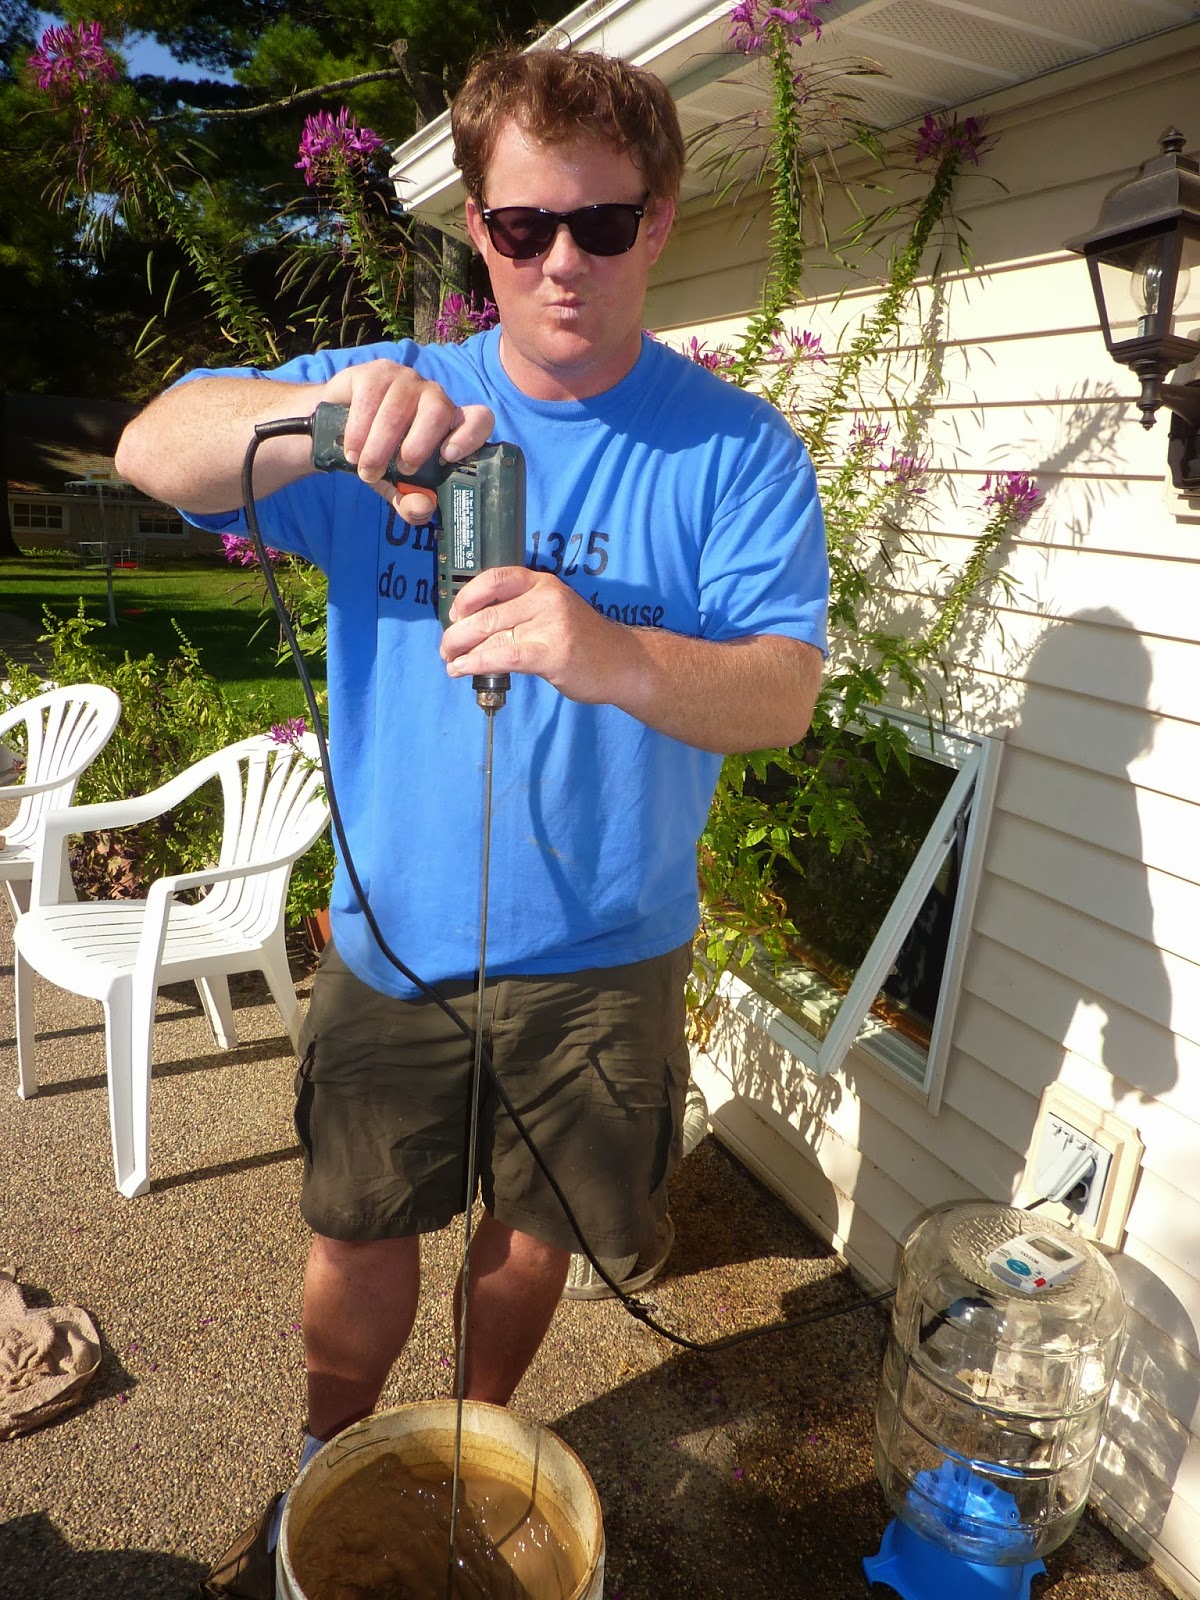
Now, time to make the 'slip' - a very loose clay mixture (we dug the clay off our land - yay for free!). Charlie is using a drill with his homemade mixer to thoroughly mix the slip.

Isn't that cleome plant behind Charlie amazing??
Next, wood planer shavings to add to the slip. This will create the insulation layer.

Pouring the slip into the planer shavings.

Mix, mix, mix!!

Need a bit more slip to get the right consistency.

Working the planer shavings/slip insulation mixture inside the form and around all the bottles.
Now, the bottom insulation layer is dry and the form removed.

Now, time to start building the floor! Here Charlie is mixing up "cob" a clay mixture made with clay, sand, cat tail fluff and water. Cat tail fluff, you ask? The object is to add strength to the cob mixture, and cat tails are free and plentiful!

Mixing up the cob the easiest way; grinding and mixing with our feet. Using rubber boots was great - we were able to easily rinse them off!

As the mixture gets too spread out, we were able to use the corners of the tarp to pull the mixture back to the center.

Need to add a bit more water to get the right cob consistency.

Time to start troweling the floor in place.

Many batches of cob to mix up! I lost track of how many batches it took to make the whole earth oven.

This floor won't cover the whole insulation layer, because the dome will fill in the edges later. As you can see, we worked into the night on several occasions!

Now, it is time to design the arch. The arch is made out of firebrick. Charlie set these bricks out on paper to draw the curve and make the arch mold.

Building the "screed" area:

to make sure the floor of the oven will be perfectly flat and smooth.

As you can see, the actual floor of the oven will be made out of firebrick.

Checking to make sure the screed forms are level and square (the firebricks here are just setting there for now).

Adding a bit more cob to the back.

Next, the floor is covered with straight sand. After using the screeding technique, this sand will be a perfectly flat place to arrange the fire bricks.

Beginning to place the fire bricks out on the perfectly flat sand.


Now, time to build the arch! Note: you don't have to have an arch for your door, you could also make a square opening.

Charlie built the wooden form to place the arch bricks around. For the time being, we are using little rocks to hold each fire brick in place.

Tada! The arch.

Charlie's clever idea - place a light bulb under a fire proof bowl to help dry the cob later on!

Next, using straight sand to form the shape of the inside of the oven. After the shell is made, this sand will be removed.

Looks nice and smooth - and what a great shape!


Also, at this time, you can see we are bringing out the floor near the arch a bit.


Now, time to let it dry thoroughly. We'll turn on that light bulb to create some inside heat! This layer must dry thoroughly before we remove the sand from the inside - we don't want a collapse!

A couple of days later, when the cob layer was mostly dry, we removed all the sand from the inside of oven.
We decided to build a small fire inside the oven part to help dry the cob layer the rest of the way. It was really fun to see the fire on the oven for the first time! In this photo, you can see the newspaper burning away.


Next, time to build the insulation layer. This consisted of wood planer shavings mixed with more slip. We placed more empty glass bottles around the base of the earth oven, to give it just a bit more insulation.

As you can see, this insulation layer is quite thick -a good 4 inches over the whole cob layer.


Higher and higher the insulation layer goes!

Almost there!


Well, since we have a fire, why not cook our very first pizza??!! Time to get out the pizza peel!

As you can see from this photo, the hot coals are brushed to the side and the pizza is cooked directly on the firebrick floor.


Are you done yet, little pizza?? We are so excited to eat you!

Um, yes! It looks perfect!

Next pizza: tomato sauce, fresh mozzarella, sun dried tomatoes and fresh basil leaves.

Yum!

Mmmmm time to eat!

Now, as time went on, we continued to work on the earth oven. In this picture below, you can see that we are starting to form the final layer of cob.

Mmmm, time to have more pizza. I know it is kind of hard to see, but if you look inside the earth oven, you can see a piece of angle iron. This was Charlie's idea to keep the coals and ashes away from the pizza cooking area.

There, this is a better picture of the inside of the earth oven and the two pieces of angle iron holding the coals away from the pizza.

After a late night of building, the final coat of cob is on the whole oven!


The finished earth oven! It was sure a long project, but so worth it.

Now, a brief tutorial on how to run the earth oven:
Prepare wood and kindling. The unfortunate thing about the earth oven is that it requires quite a bit of small wood pieces. Note: I wanted to point out one thing about this picture: notice how the arch is black but the inside of the oven is sand colored? This is because the oven gets so hot on the inside that the soot is burned off - this happens at around 700 degrees F.

Light the wood! You want to have a nice fire going in the earth oven for about two hours before you want to cook pizzas. All the layers need time to warm up and get really hot - i.e. 700 degrees F.

Then, place the pieces of angle iron inside to move the coals away from the cooking surface. Clean the area with a scuffle (strips of rags tied to a stick). The scuffle is soaked with water and does a pretty good job of cleaning the floor. Then, time to cook the pizzas!

As you cook the pizzas, the oven will very slowly loose heat. After a couple of hours of cooking pizzas, when the oven temp gets down to about 450 to 400 degrees F., you can bake some loaves of bread. Here we are baking some sourdough bread.

Next, as the temperature declines further, you can bake cookies in the oven. We cooked a batch of sugar cookies and they turned out great. I was afraid they might taste smoky, but they didn't at all, just crisp, delicate and sweet!

Since I didn't have a small enough pan, I placed two layers of tin foil over a small wire rack and baked the cookies on that.

Then, as the temperature declines further, you can cook a pot of beans or a pot of stew for a few hours.


Then, by this time night is probably falling and the fire has died out in the oven (keep in mind you haven't put any wood in since many, many hours earlier). Now it is time to load the inside of the oven with wood. The wood will be kiln-dried and perfect for feeding your earth oven next time you fire it up.

Isn't that a great timeline of events? And a great way to use all of the heat from the earth oven? We are looking forward to this next summer when we can experiment with cooking other things in the earth oven.
But now, it is time to make pizzas! This was last summer. In this following picture you can see my dad, Scott (in the 'red cross' tee shirt) and his brother Mark at the pizza "counter." Dad is rolling out home made pizza crusts, and Uncle Mark is making a pizza. A few things to note; the pizza peel is thoroughly sprinkled with corn meal - a must for removing the raw pizza from the peel to the earth oven. Next, note Charlie in the background, pulling out a cooked pizza - he made two pizza peels; one out of wood so people can be making a pizza on it, and another one out of stainless steel to remove the very hot pizzas from the earth oven when they are done cooking.

Now, finally, after all that work, it is time to eat! This looks like a good pizza - home made garlic Alfredo sauce, roasted red peppers, onions, bacon, mozzarella and Parmesan cheese!

P.S. I hope you learned something from this gigantic post - and maybe, we even inspired you to make your own earth oven!
P.S.S. Next, I will work on a post featuring our home made pizza dough, home made sauces and all of our favorite topping combinations!
Great post! I really enjoyed reading it and looking at the pictures. Makes me want one of my own!
ReplyDelete